Creating a Workflow
Workflows in Goliath automate multi-touch outreach sequences, internal tasks, and deal stage transitions. A drip workflow lets you nurture new leads with timed email or text follow-ups without manual effort. Once you define the trigger, delays, and actions, Goliath runs the sequence automatically—ensuring no lead falls through the cracks.
Step-by-Step Guide
Section titled “Step-by-Step Guide”-
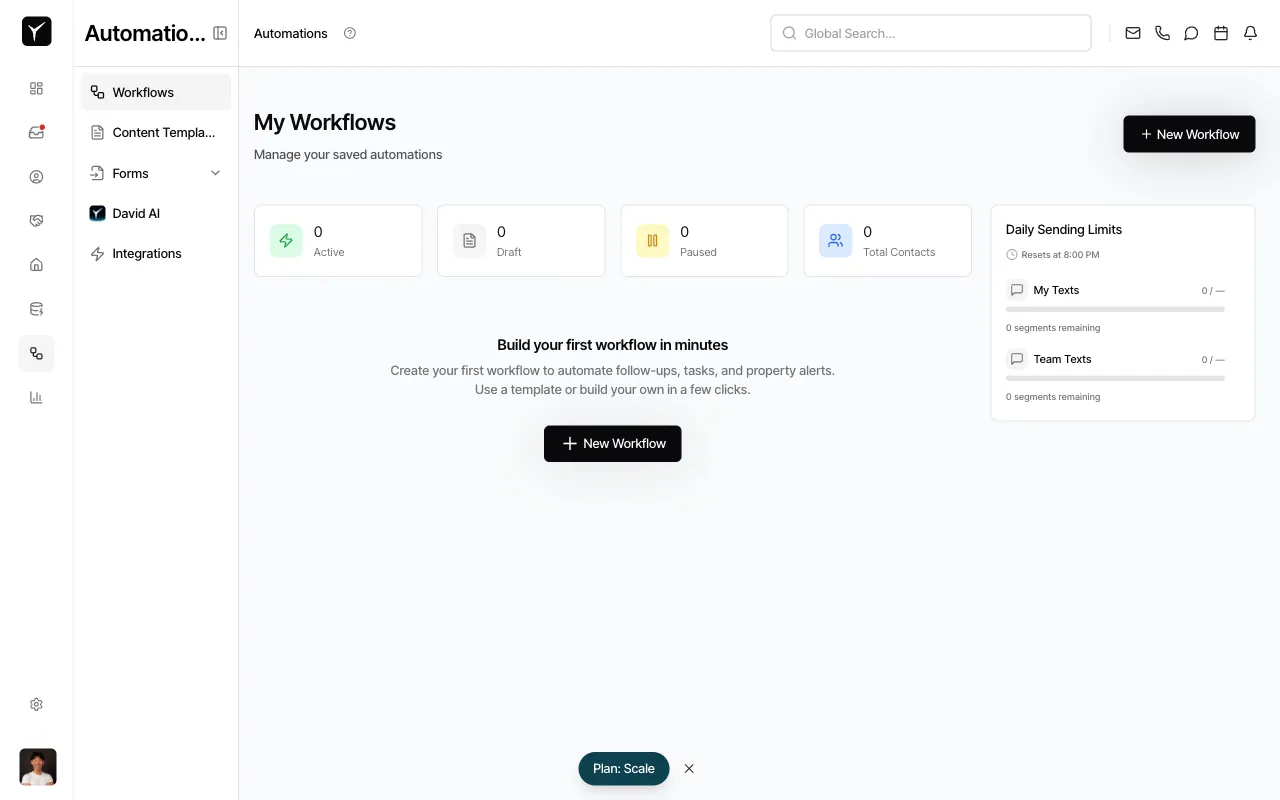
Open the workflow builder
From the Workflows page, click + New Workflow to launch the creation wizard.
-
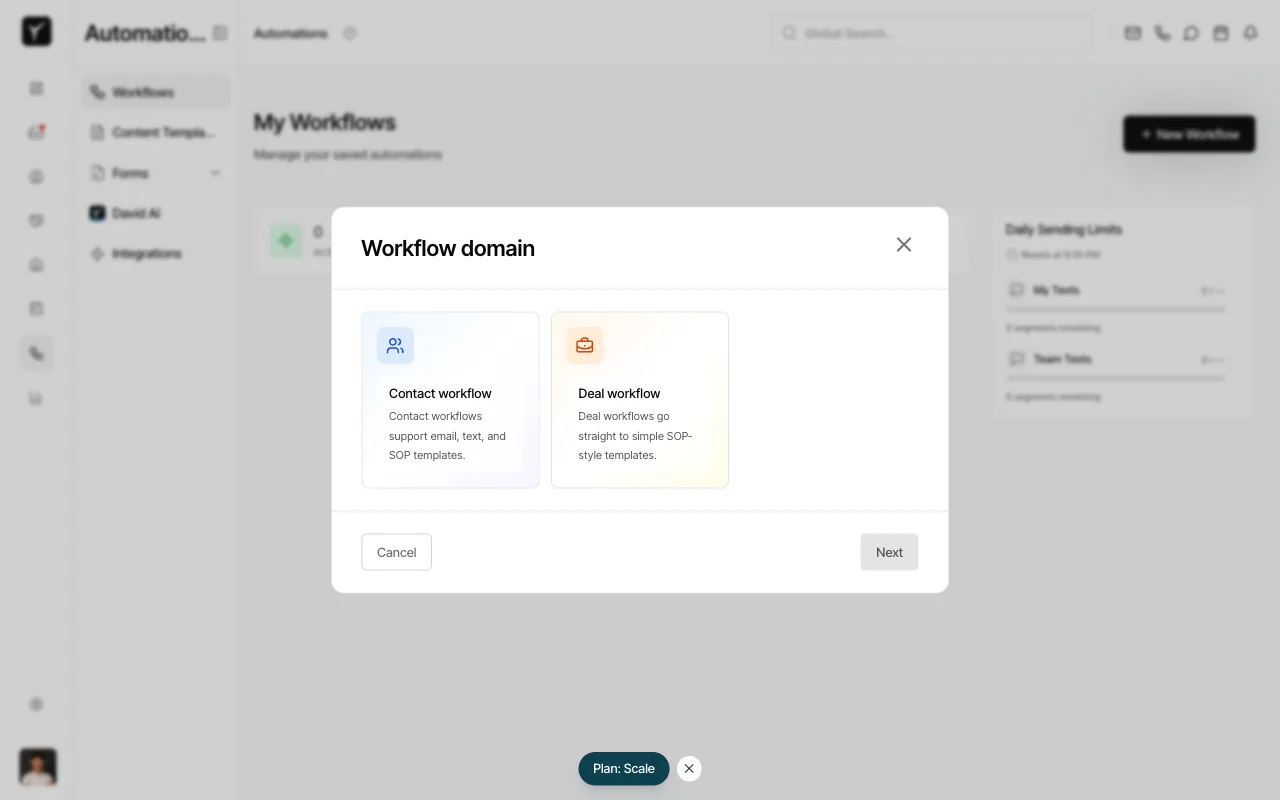
Select the workflow domain
Choose Contact workflow to enable email and text outreach. Contact workflows support outbound messaging and internal actions like tasks and notifications. (Deal and Property workflows are SOP-only and do not include email or text nodes.)
-
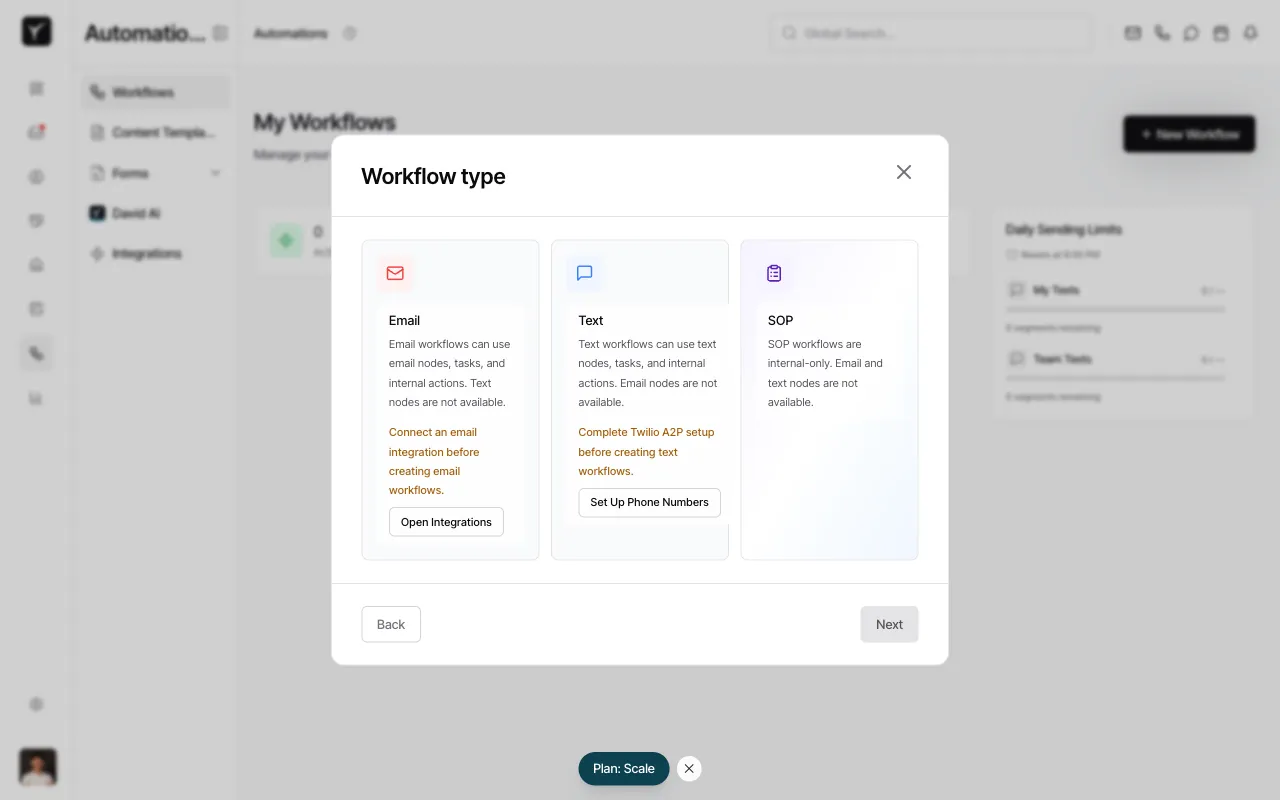
Choose the workflow type
Select Email to unlock email action nodes in the builder. Email workflows can also include tasks, waits, and conditionals—but the primary outreach channel is email. (For text-first drips, choose Text; for internal-only automation, choose SOP.)
-
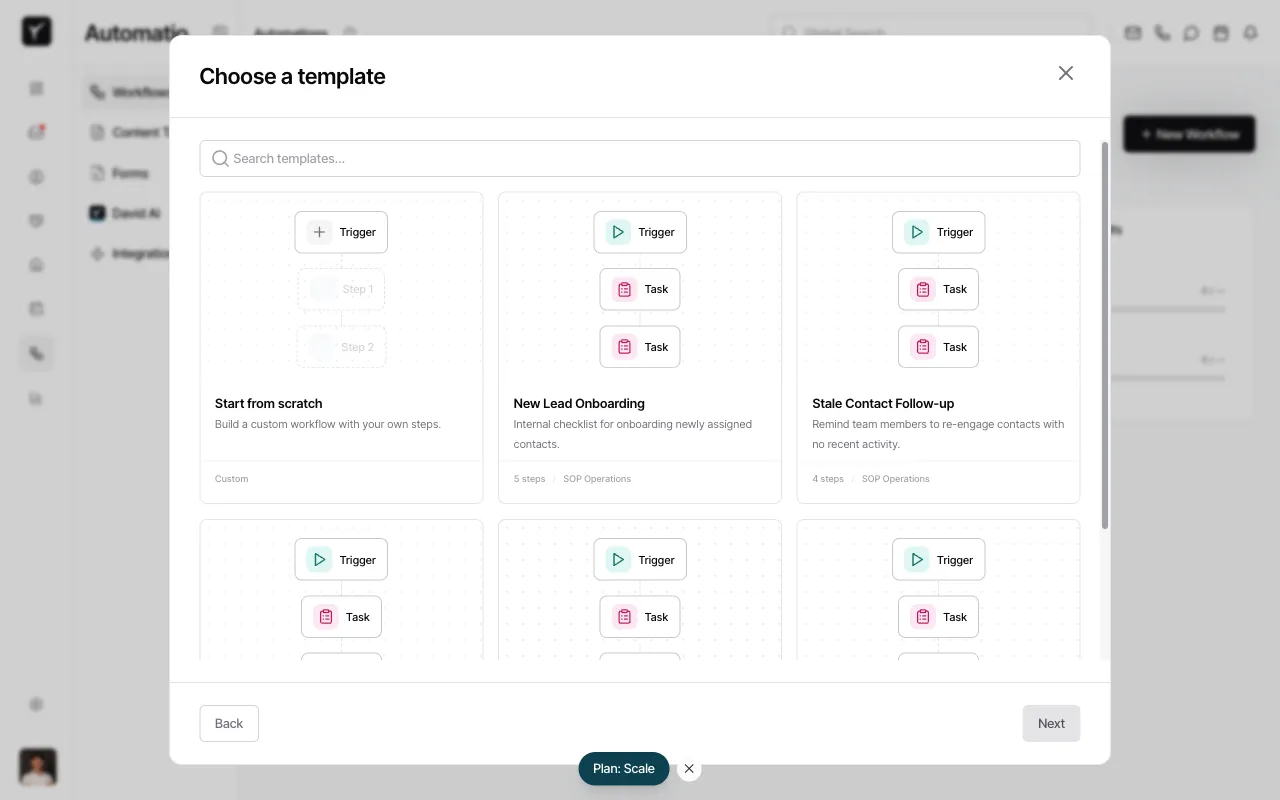
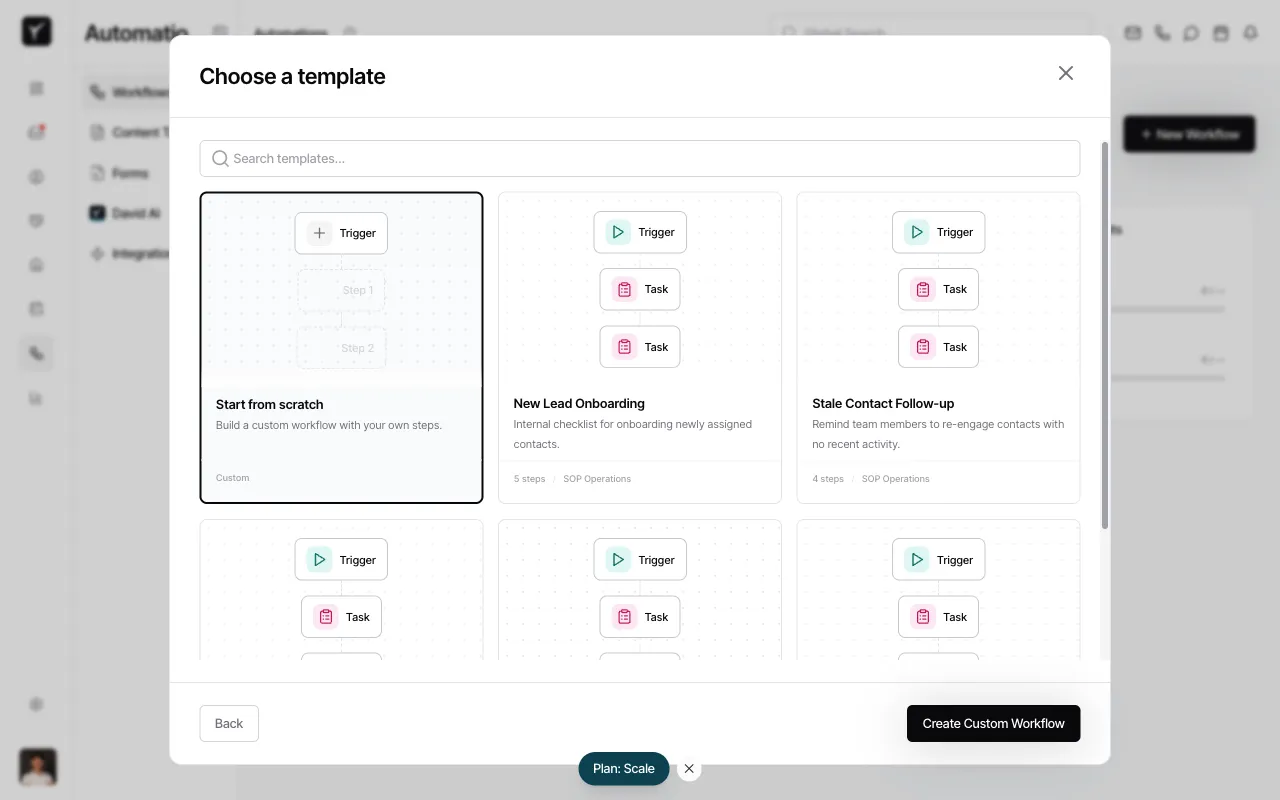
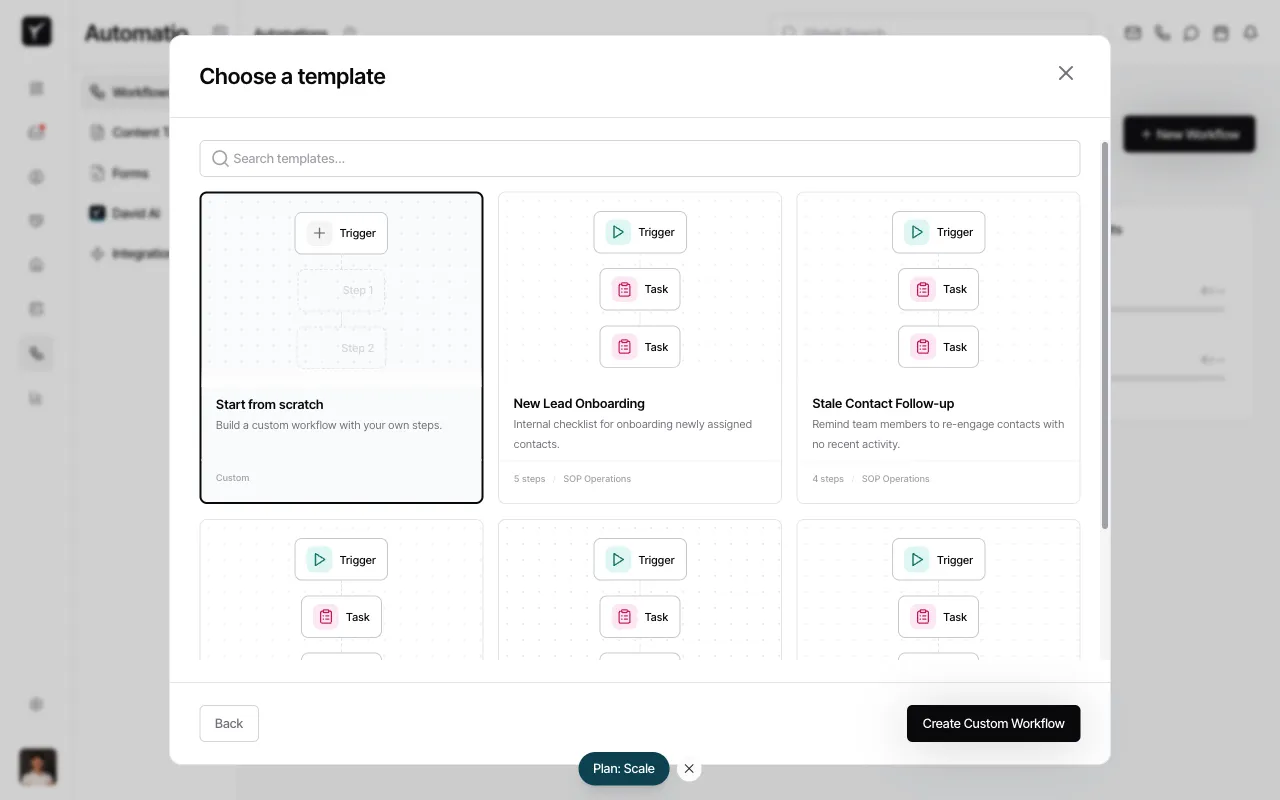
Pick a template or start from scratch
The template library offers pre-built drip sequences for common use cases like new lead onboarding and stale contact re-engagement. Select Start from scratch to build a custom workflow from a blank canvas.
-
Confirm your selection
Once you’ve selected Start from scratch, click Create Custom Workflow to open the workflow canvas.
-
Configure the trigger
Every workflow begins with a Trigger node. In the right panel under Trigger type, choose how the workflow starts. For manual testing, select Manual. (In production, you can switch to User Added to auto-enroll new contacts.)
-
Add the first wait step
Click the Add button below the trigger node. From the menu, select Wait. This pauses the workflow before the first touchpoint.
-
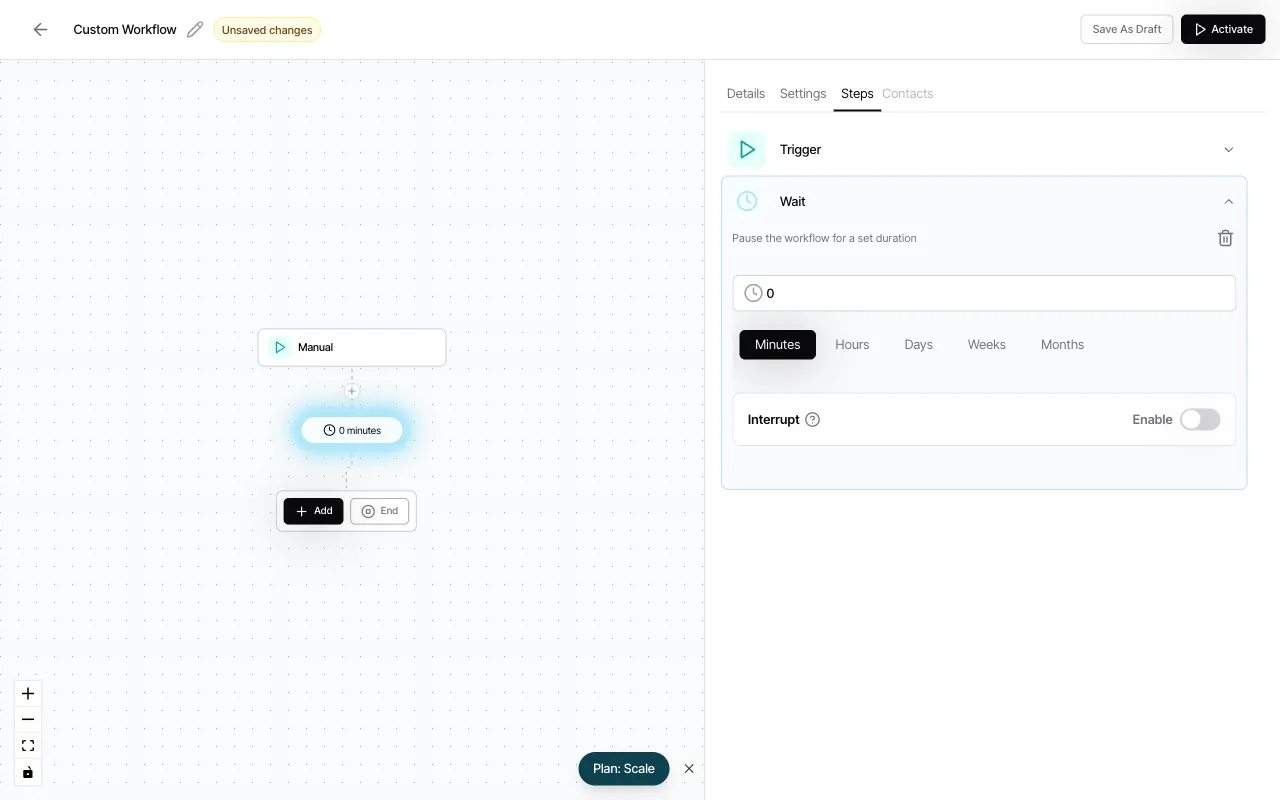
Set the delay duration
In the Wait panel, enter
1and select Days from the time-unit buttons. This schedules the first email to send one day after the trigger fires.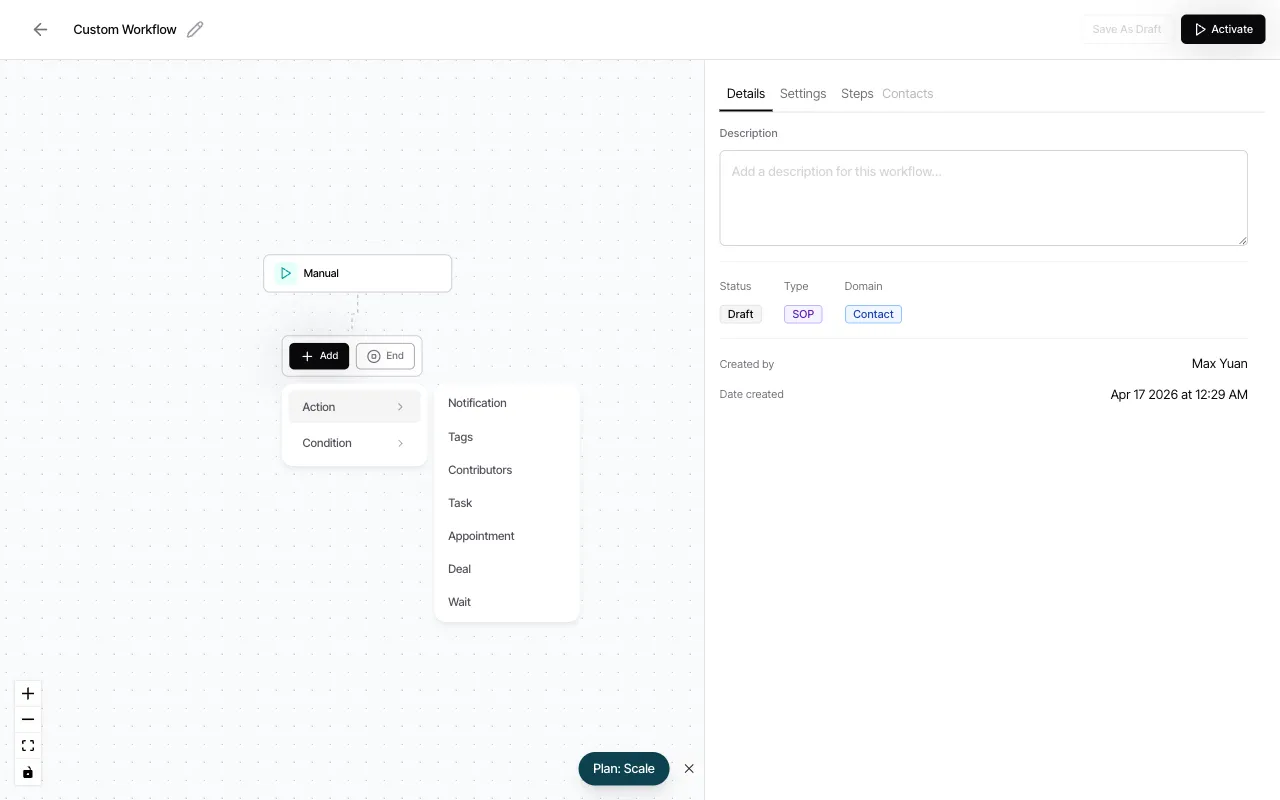
-
Review the configured wait
The canvas now displays the one-day wait node between the trigger and the next action. The right panel confirms the delay settings.
-
Add more actions
Click the Add button below the wait node to insert the next step. You can add Notification, Tags, Task, Appointment, Deal, or another Wait node. For a drip sequence, repeat the pattern: Wait → Send Email (or create a task) → Wait → Send Email, and so on.
-
Save as draft
Click Save As Draft in the top-right corner to preserve your work without activating the workflow. Draft workflows are visible in the workflow list but do not trigger automatically.
Frequently Asked Questions
Section titled “Frequently Asked Questions”Q: What’s the difference between Email, Text, and SOP workflow types?
Section titled “Q: What’s the difference between Email, Text, and SOP workflow types?”The type determines which outbound action nodes are available. Email workflows include the Send Email node; Text workflows include the Send Text node; SOP workflows have neither and support only internal actions like tasks, notifications, and deal stage changes.
Q: Can I edit a workflow that’s already running?
Section titled “Q: Can I edit a workflow that’s already running?”Yes. Changes take effect on future workflow runs. Contacts currently mid-sequence continue with the version that was active when they entered.
Q: How do I stop a drip once a contact responds?
Section titled “Q: How do I stop a drip once a contact responds?”Add a Condition node that checks for a reply or a specific tag (e.g., “Replied”). If the condition is true, route the contact to an End node. This exits the sequence and prevents further sends.
Q: Can the same contact enter a workflow multiple times?
Section titled “Q: Can the same contact enter a workflow multiple times?”This is configurable per workflow. By default, contacts enter once. Check the workflow Settings tab to allow re-entry after a set cooldown period.
Q: What happens if a delay spans a weekend or holiday?
Section titled “Q: What happens if a delay spans a weekend or holiday?”By default, waits count calendar time and send on the scheduled day. You can configure organization-wide quiet hours in Settings to prevent sends outside business hours.
Q: How do I know if my workflow is working?
Section titled “Q: How do I know if my workflow is working?”Each workflow run appears on the contact’s timeline and in the workflow’s Run History (accessible from the workflow detail page). Review completed steps to confirm sends and delays executed as expected.