How Property Filters Work
Property filters let you narrow down your property search by location, size, type, owner characteristics, and dozens of other criteria. You can combine multiple filters to build precise searches, save them for one-click access, and share them with your team. Filters appear in the left sidebar under SAVED FILTERS for quick reuse.
Step-by-Step Guide
Section titled “Step-by-Step Guide”-
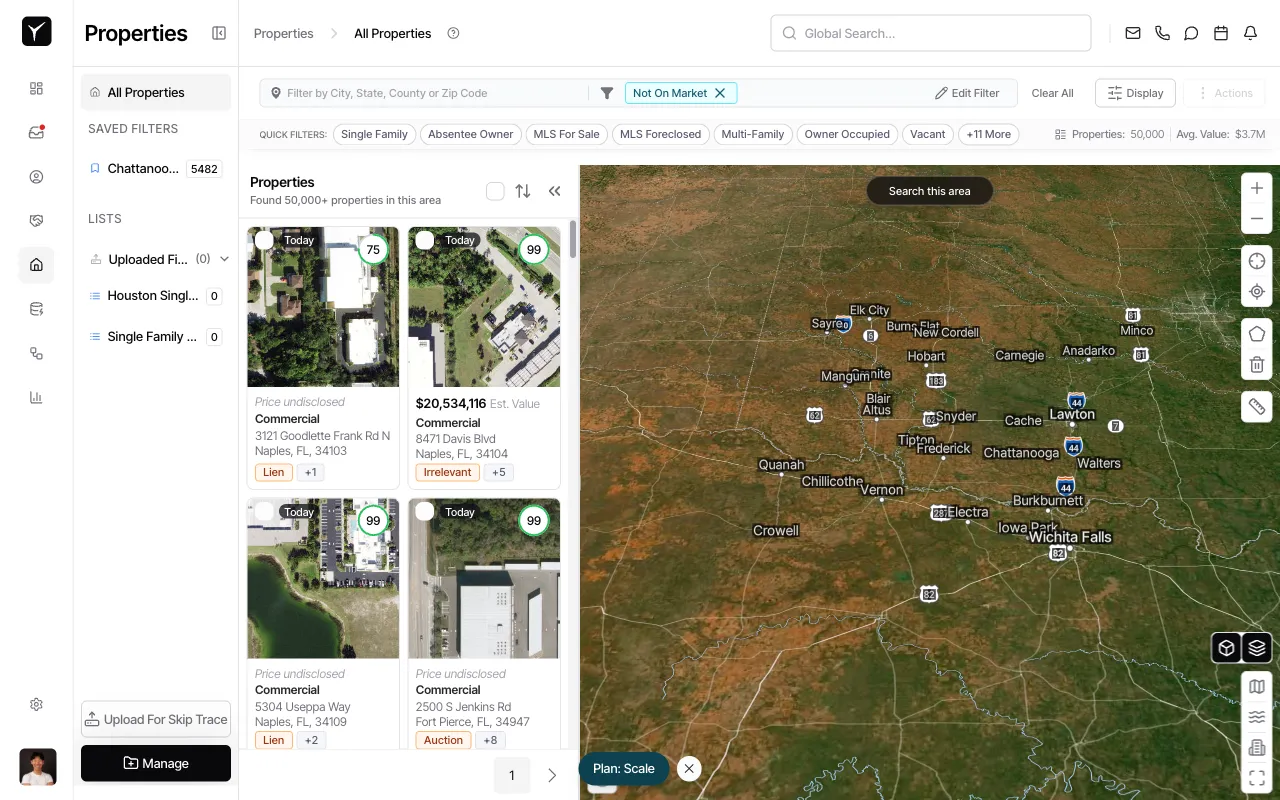
Open the Properties page
Navigate to the Properties section from the main navigation. You’ll see the full property list with any active filters displayed above the results.
-
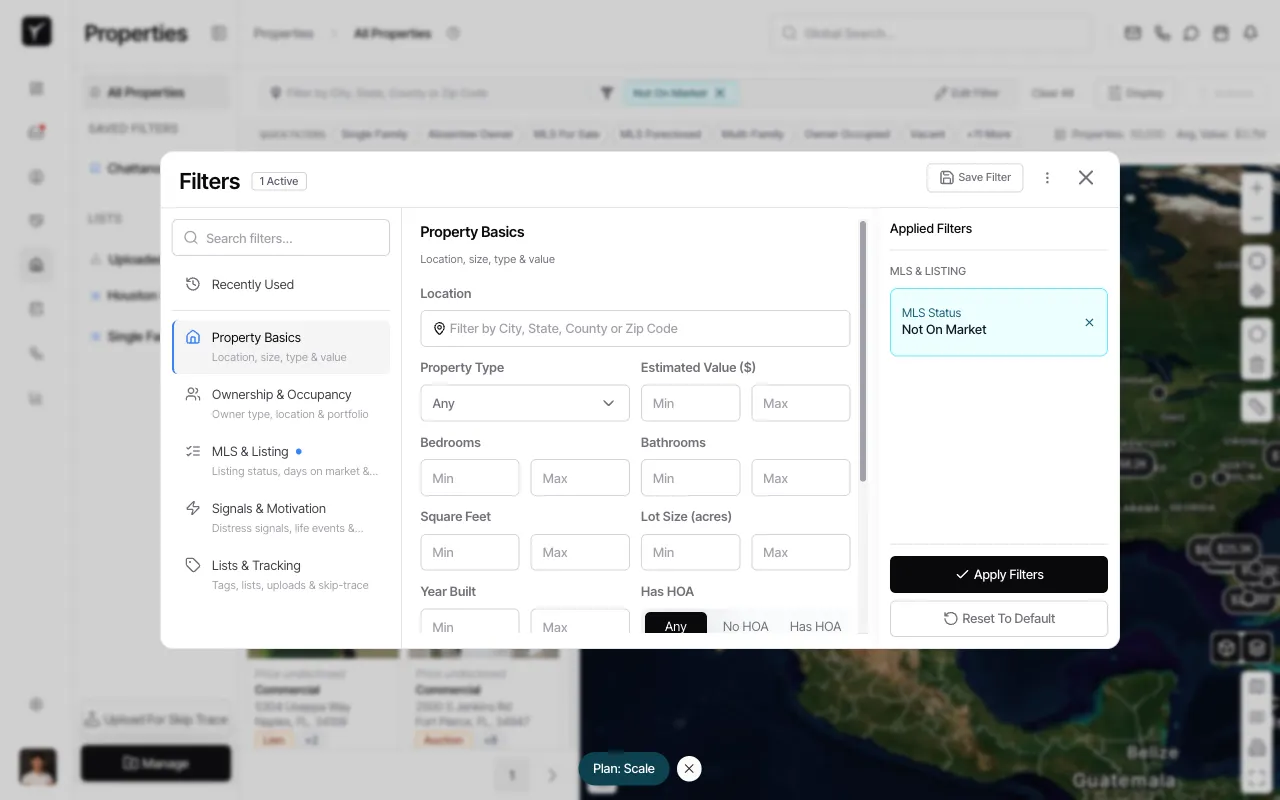
Click Edit Filter to open the Filters dialog
Click the Edit Filter button in the toolbar to open the full filtering interface. The dialog shows filter categories on the left and your currently applied filters on the right.
-
Select a filter category
Choose a category from the left sidebar to see available filter options. Property Basics includes location, size, type, and value filters. Other categories let you filter by ownership, MLS status, signals, and more.

-
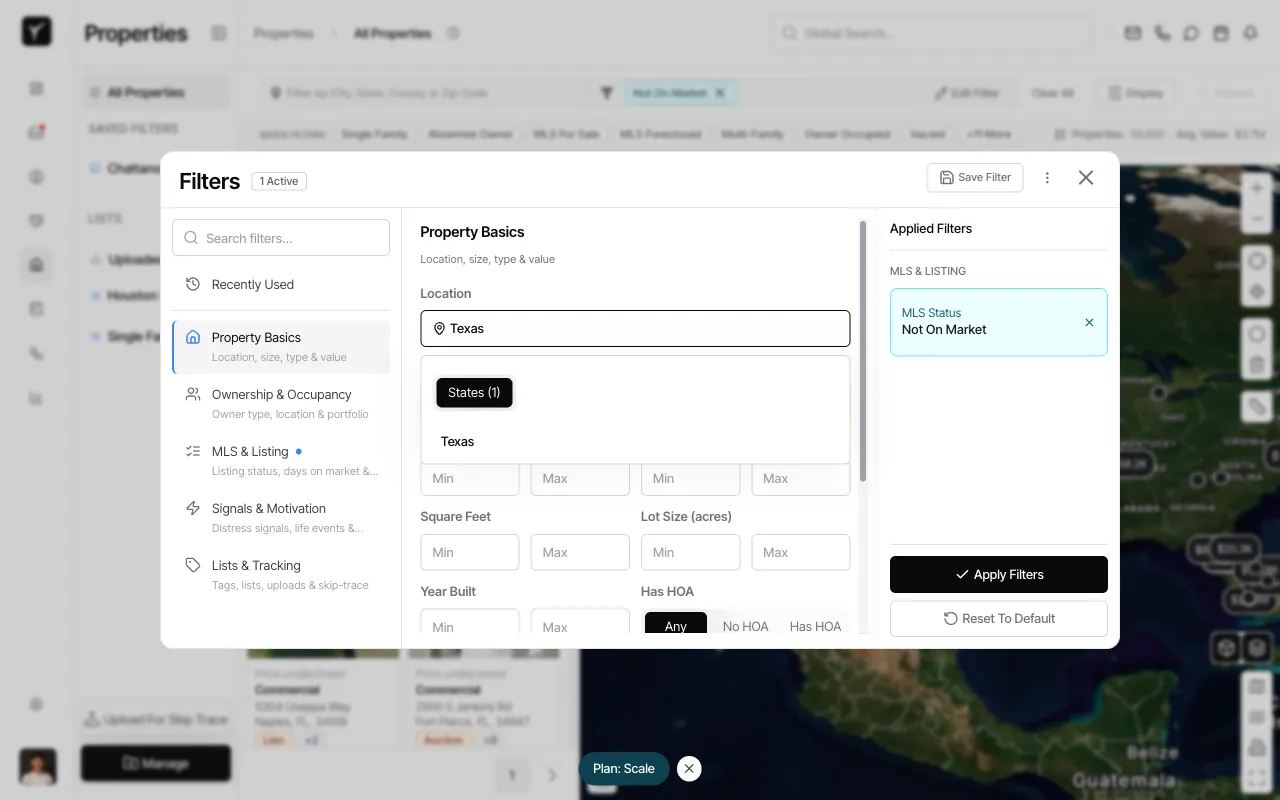
Click the Location field to add a state filter
In the Property Basics section, click the Location field to begin entering a location filter. You can search by city, state, county, or zip code.
-
Type a state name
Begin typing a state name in the location field. Goliath will suggest matching states as you type.

-
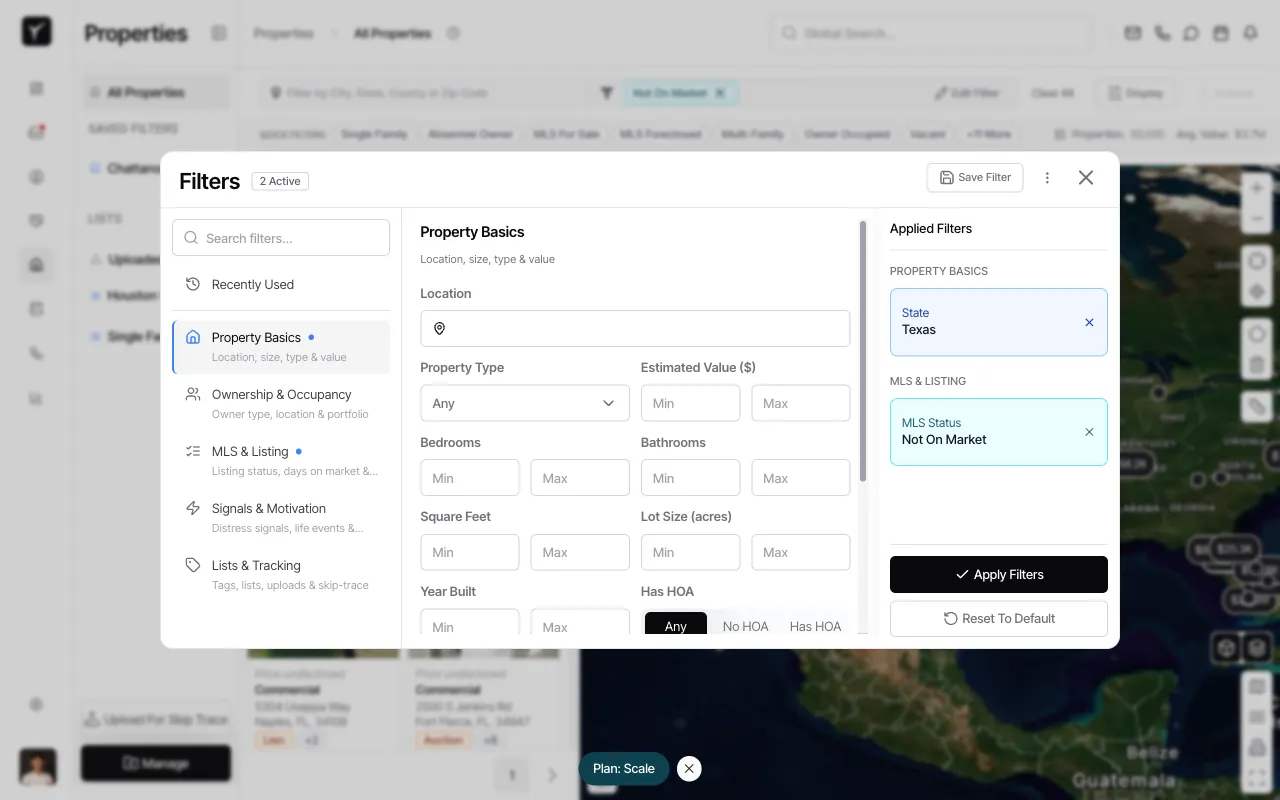
Confirm the filter is applied
Once you select a state, it appears in the Applied Filters panel on the right. The filter count at the top of the dialog updates to show how many filters are currently active.
-
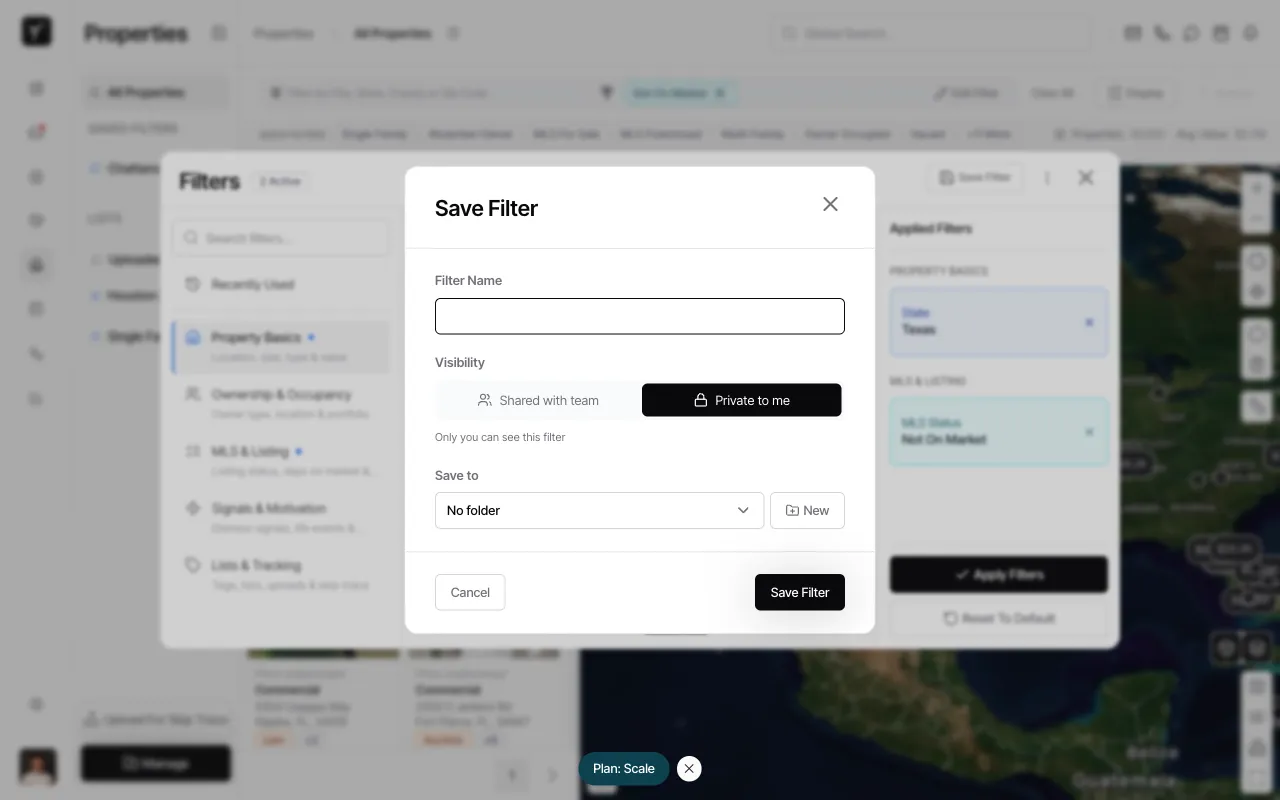
Save the filter for reuse
Click the Save Filter button in the top right of the Filters dialog. This opens the Save Filter dialog where you can name your filter and choose its visibility.
-
Choose a filter name and visibility
Enter a descriptive name for your filter. Under Visibility, choose Private to me to create an individual filter that only you can see, or Shared with team to make it available to everyone on your team. Team filters appear in every team member’s sidebar.

-
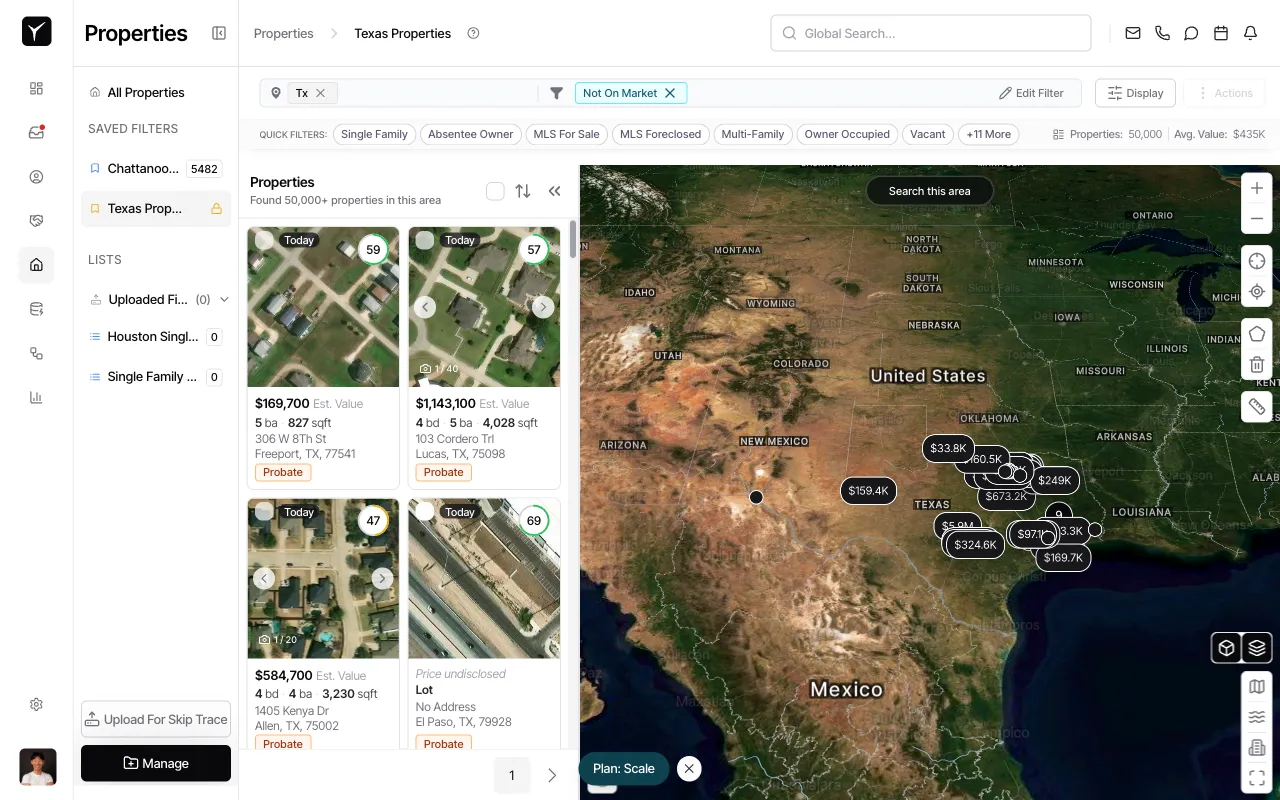
Access your saved filter from the sidebar
After saving, your filter appears under SAVED FILTERS in the left sidebar. Click the filter name to instantly apply all its criteria. Individual filters show with a lock icon, while team filters are accessible to everyone.
Frequently Asked Questions
Section titled “Frequently Asked Questions”Q: What’s the difference between Individual and Team filters?
Section titled “Q: What’s the difference between Individual and Team filters?”Individual filters are private — only you can see and use them. Team filters are shared with every member of your team and appear in everyone’s SAVED FILTERS sidebar.
Q: Can I edit a saved filter after creating it?
Section titled “Q: Can I edit a saved filter after creating it?”Yes. Click the filter name in the sidebar to apply it, then click Edit Filter to modify the criteria. Click Save Filter again to update the saved filter with your changes.
Q: How do I remove an active filter?
Section titled “Q: How do I remove an active filter?”Click the X icon next to the filter name in the toolbar, or open the Filters dialog and click the X next to the filter in the Applied Filters panel. You can also click Clear All to remove all filters at once.
Q: Why don’t I see results after applying a filter?
Section titled “Q: Why don’t I see results after applying a filter?”Some filter combinations may not match any properties in your current data set. Try using broader criteria or check that your filters are set to realistic ranges. Location filters (especially state-level filters) are most reliable in all environments.