How Do I Create a Task?
Tasks in Goliath help you track follow-ups, schedule calls, and manage your workload across contacts, properties, and deals. You can create a single task directly from a contact’s detail page when you need to log a follow-up, or batch-create tasks for multiple contacts at once—ideal for assigning the same action (like a follow-up call) to an entire segment of your pipeline.
Step-by-Step Guide
Section titled “Step-by-Step Guide”Creating a Single Task from a Contact Detail Page
Section titled “Creating a Single Task from a Contact Detail Page”-
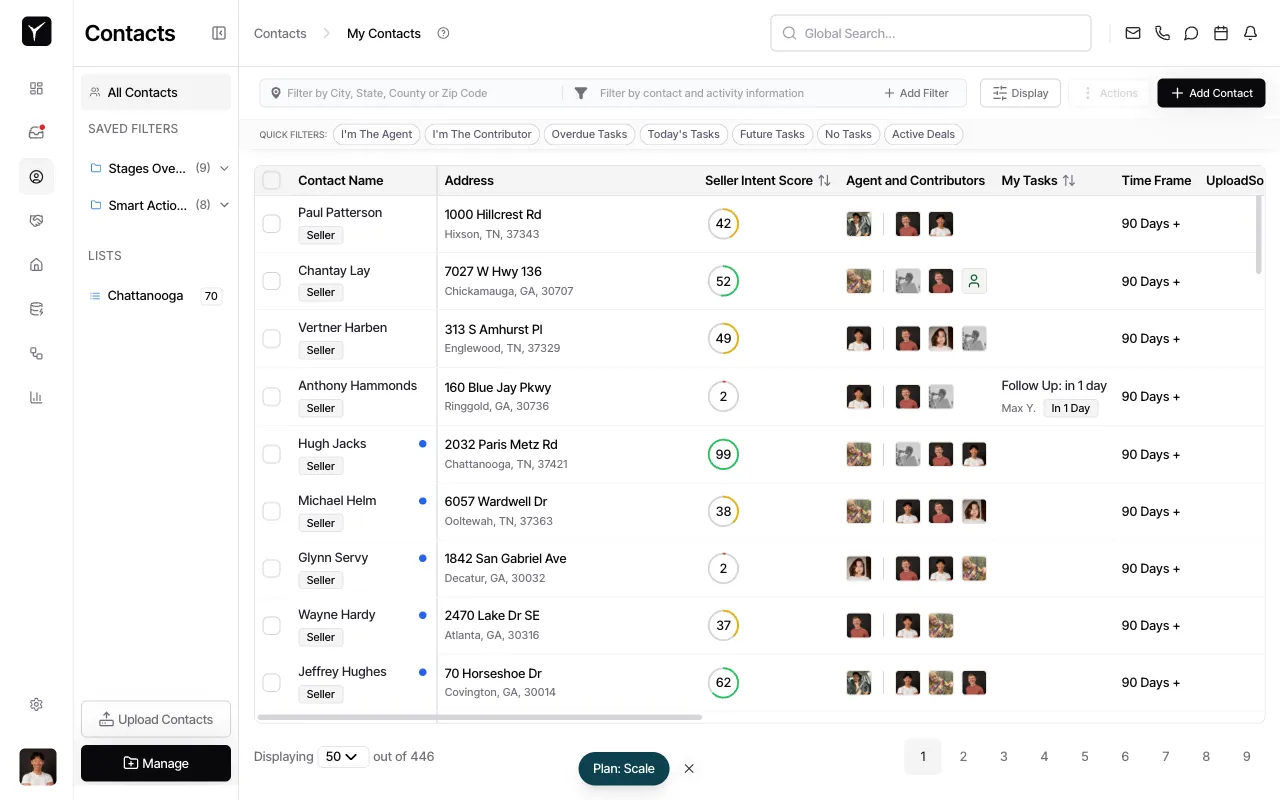
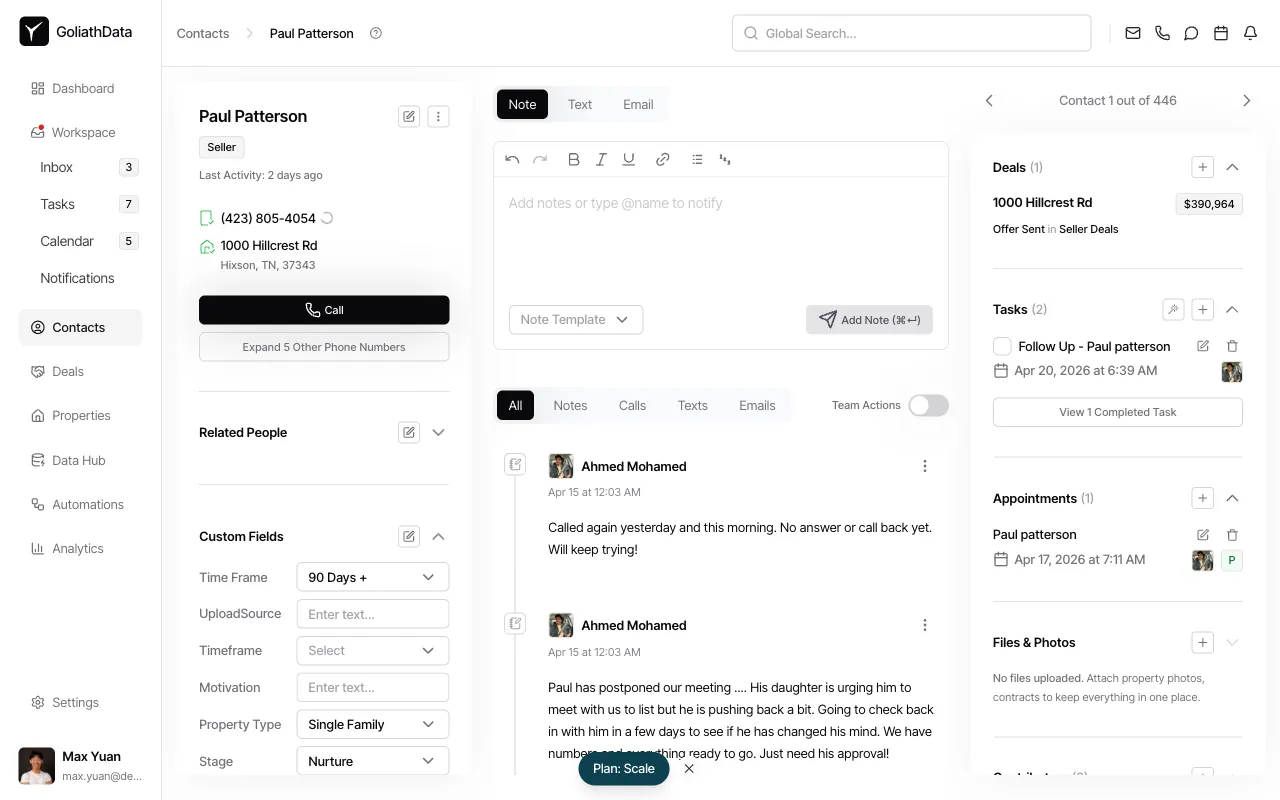
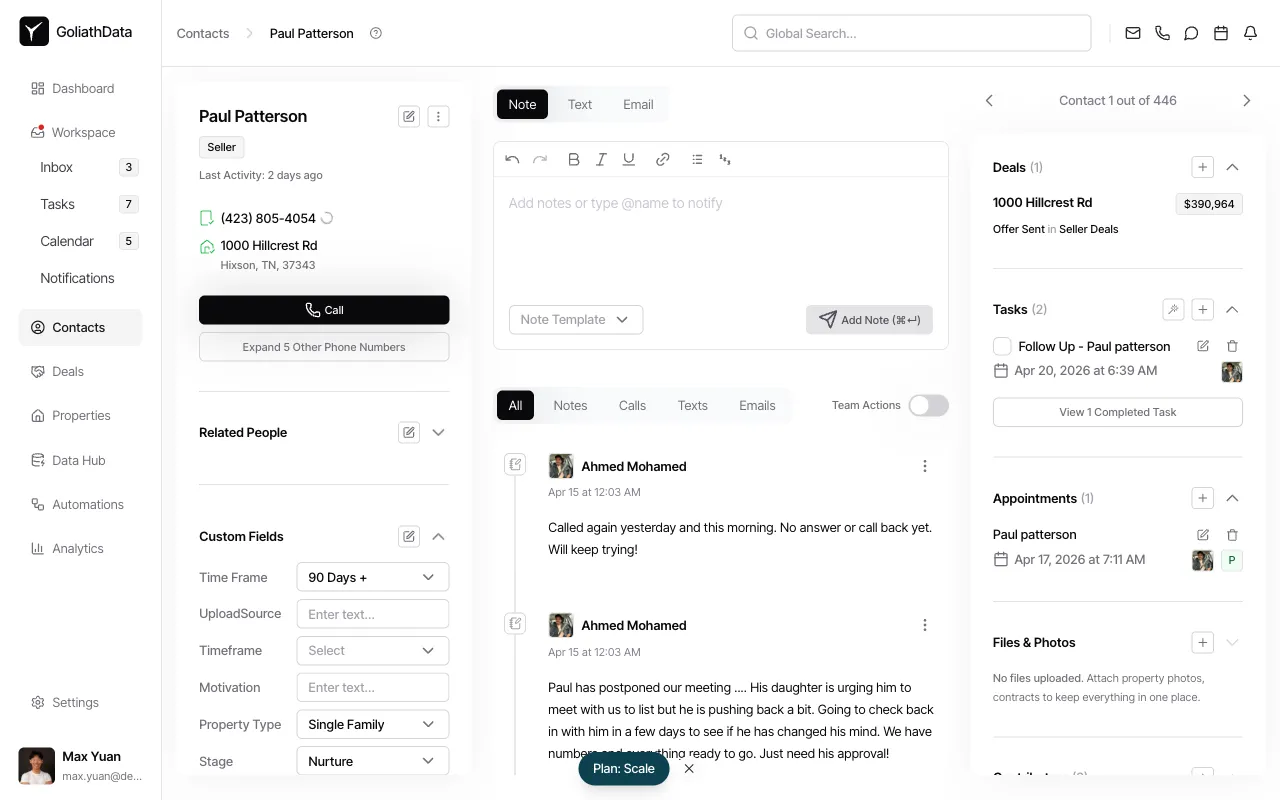
Open the contact and find the Tasks section
From the Contacts page, click a contact name to open their detail page. Scroll to the Tasks section in the right panel.
-
Click the add task button
In the Tasks section, click the + icon to open the task creation form.
-
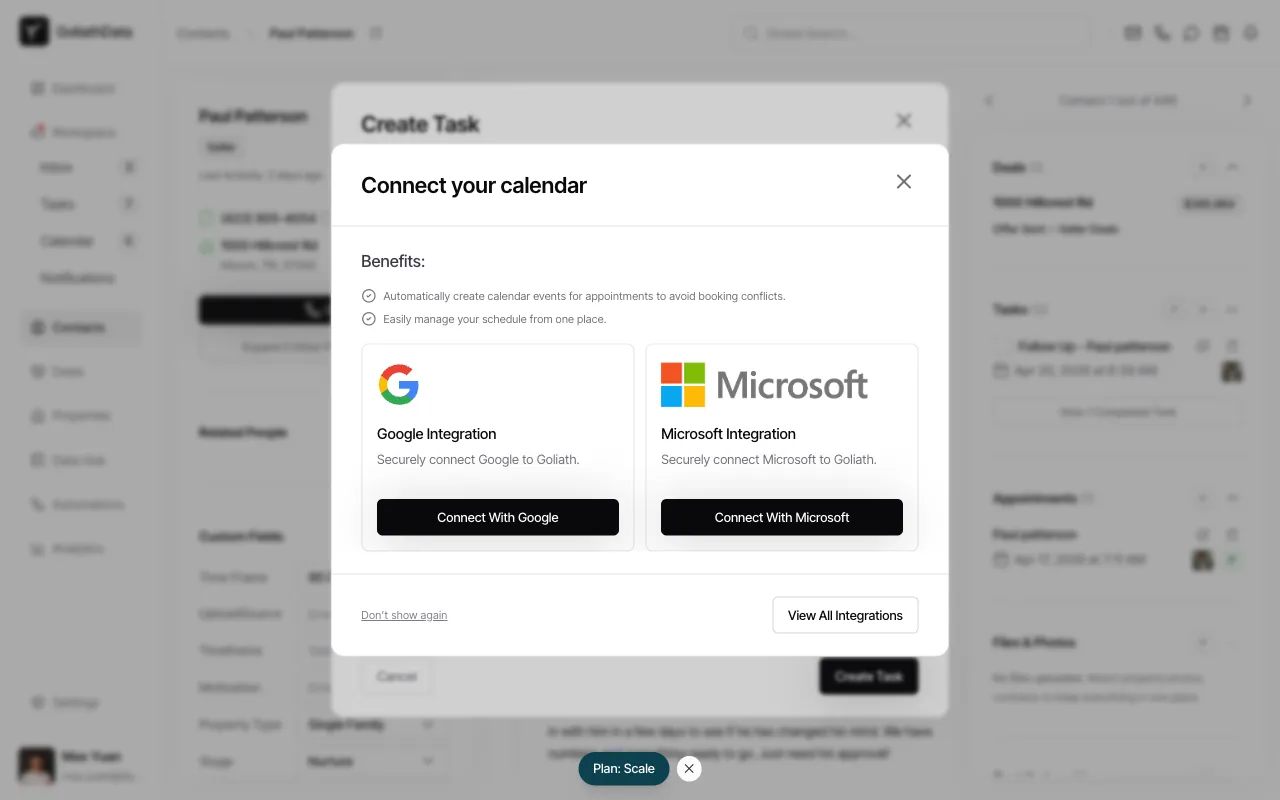
Connect your calendar (if prompted)
If you haven’t connected your calendar yet, Goliath may prompt you to integrate Google or Microsoft. Click Connect With Google or Connect With Microsoft to sync your calendar, or select Don’t show again to skip. You can also click View All Integrations to explore other options.
-
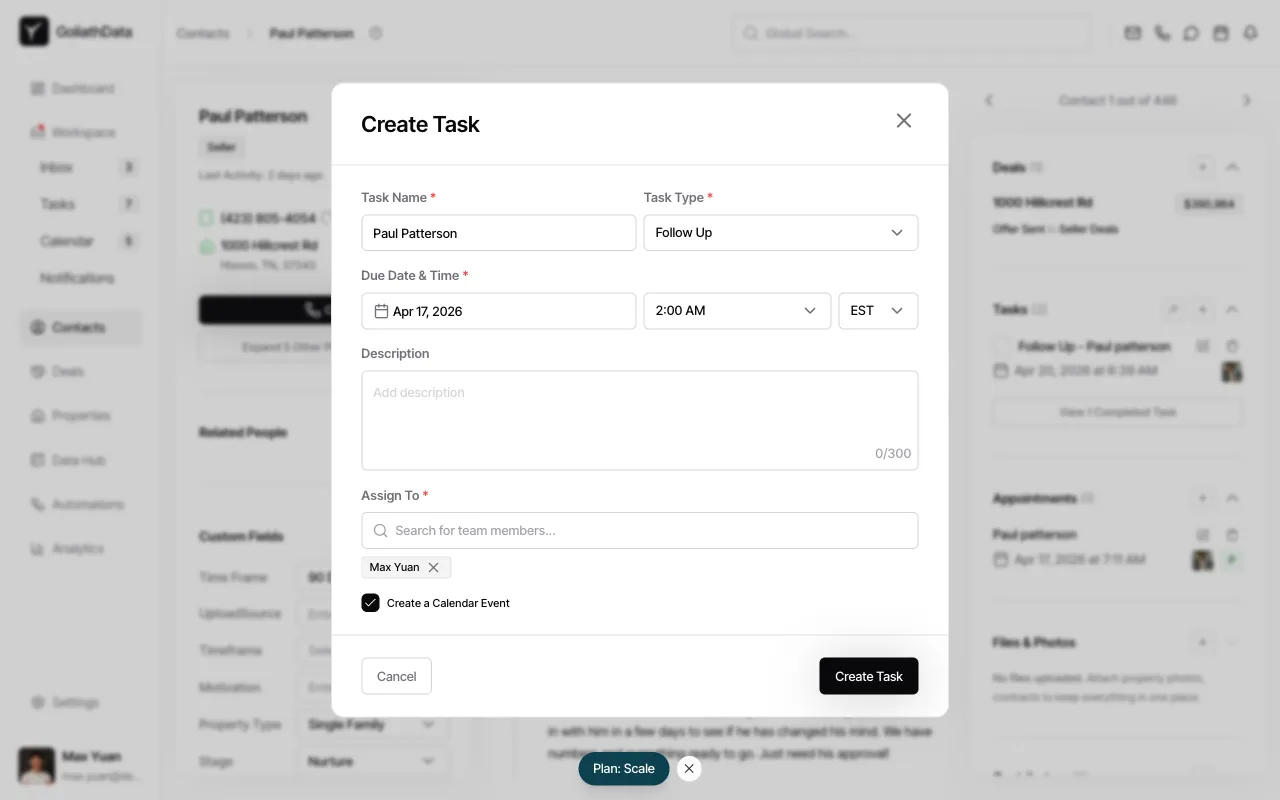
Fill in the task details
Enter a Task Name, select a Task Type (e.g., Follow Up), choose a Due Date & Time, and pick a Timezone. Use the Assign To field to assign the task to yourself or another team member. Add an optional Description for context. Check Create a Calendar Event if you want the task to appear on your synced calendar.
-
Save the task
Click Create Task to save. The task is automatically linked to the contact and will appear in the Tasks section of their detail page.
Creating Tasks in Bulk from the Contacts List
Section titled “Creating Tasks in Bulk from the Contacts List”-
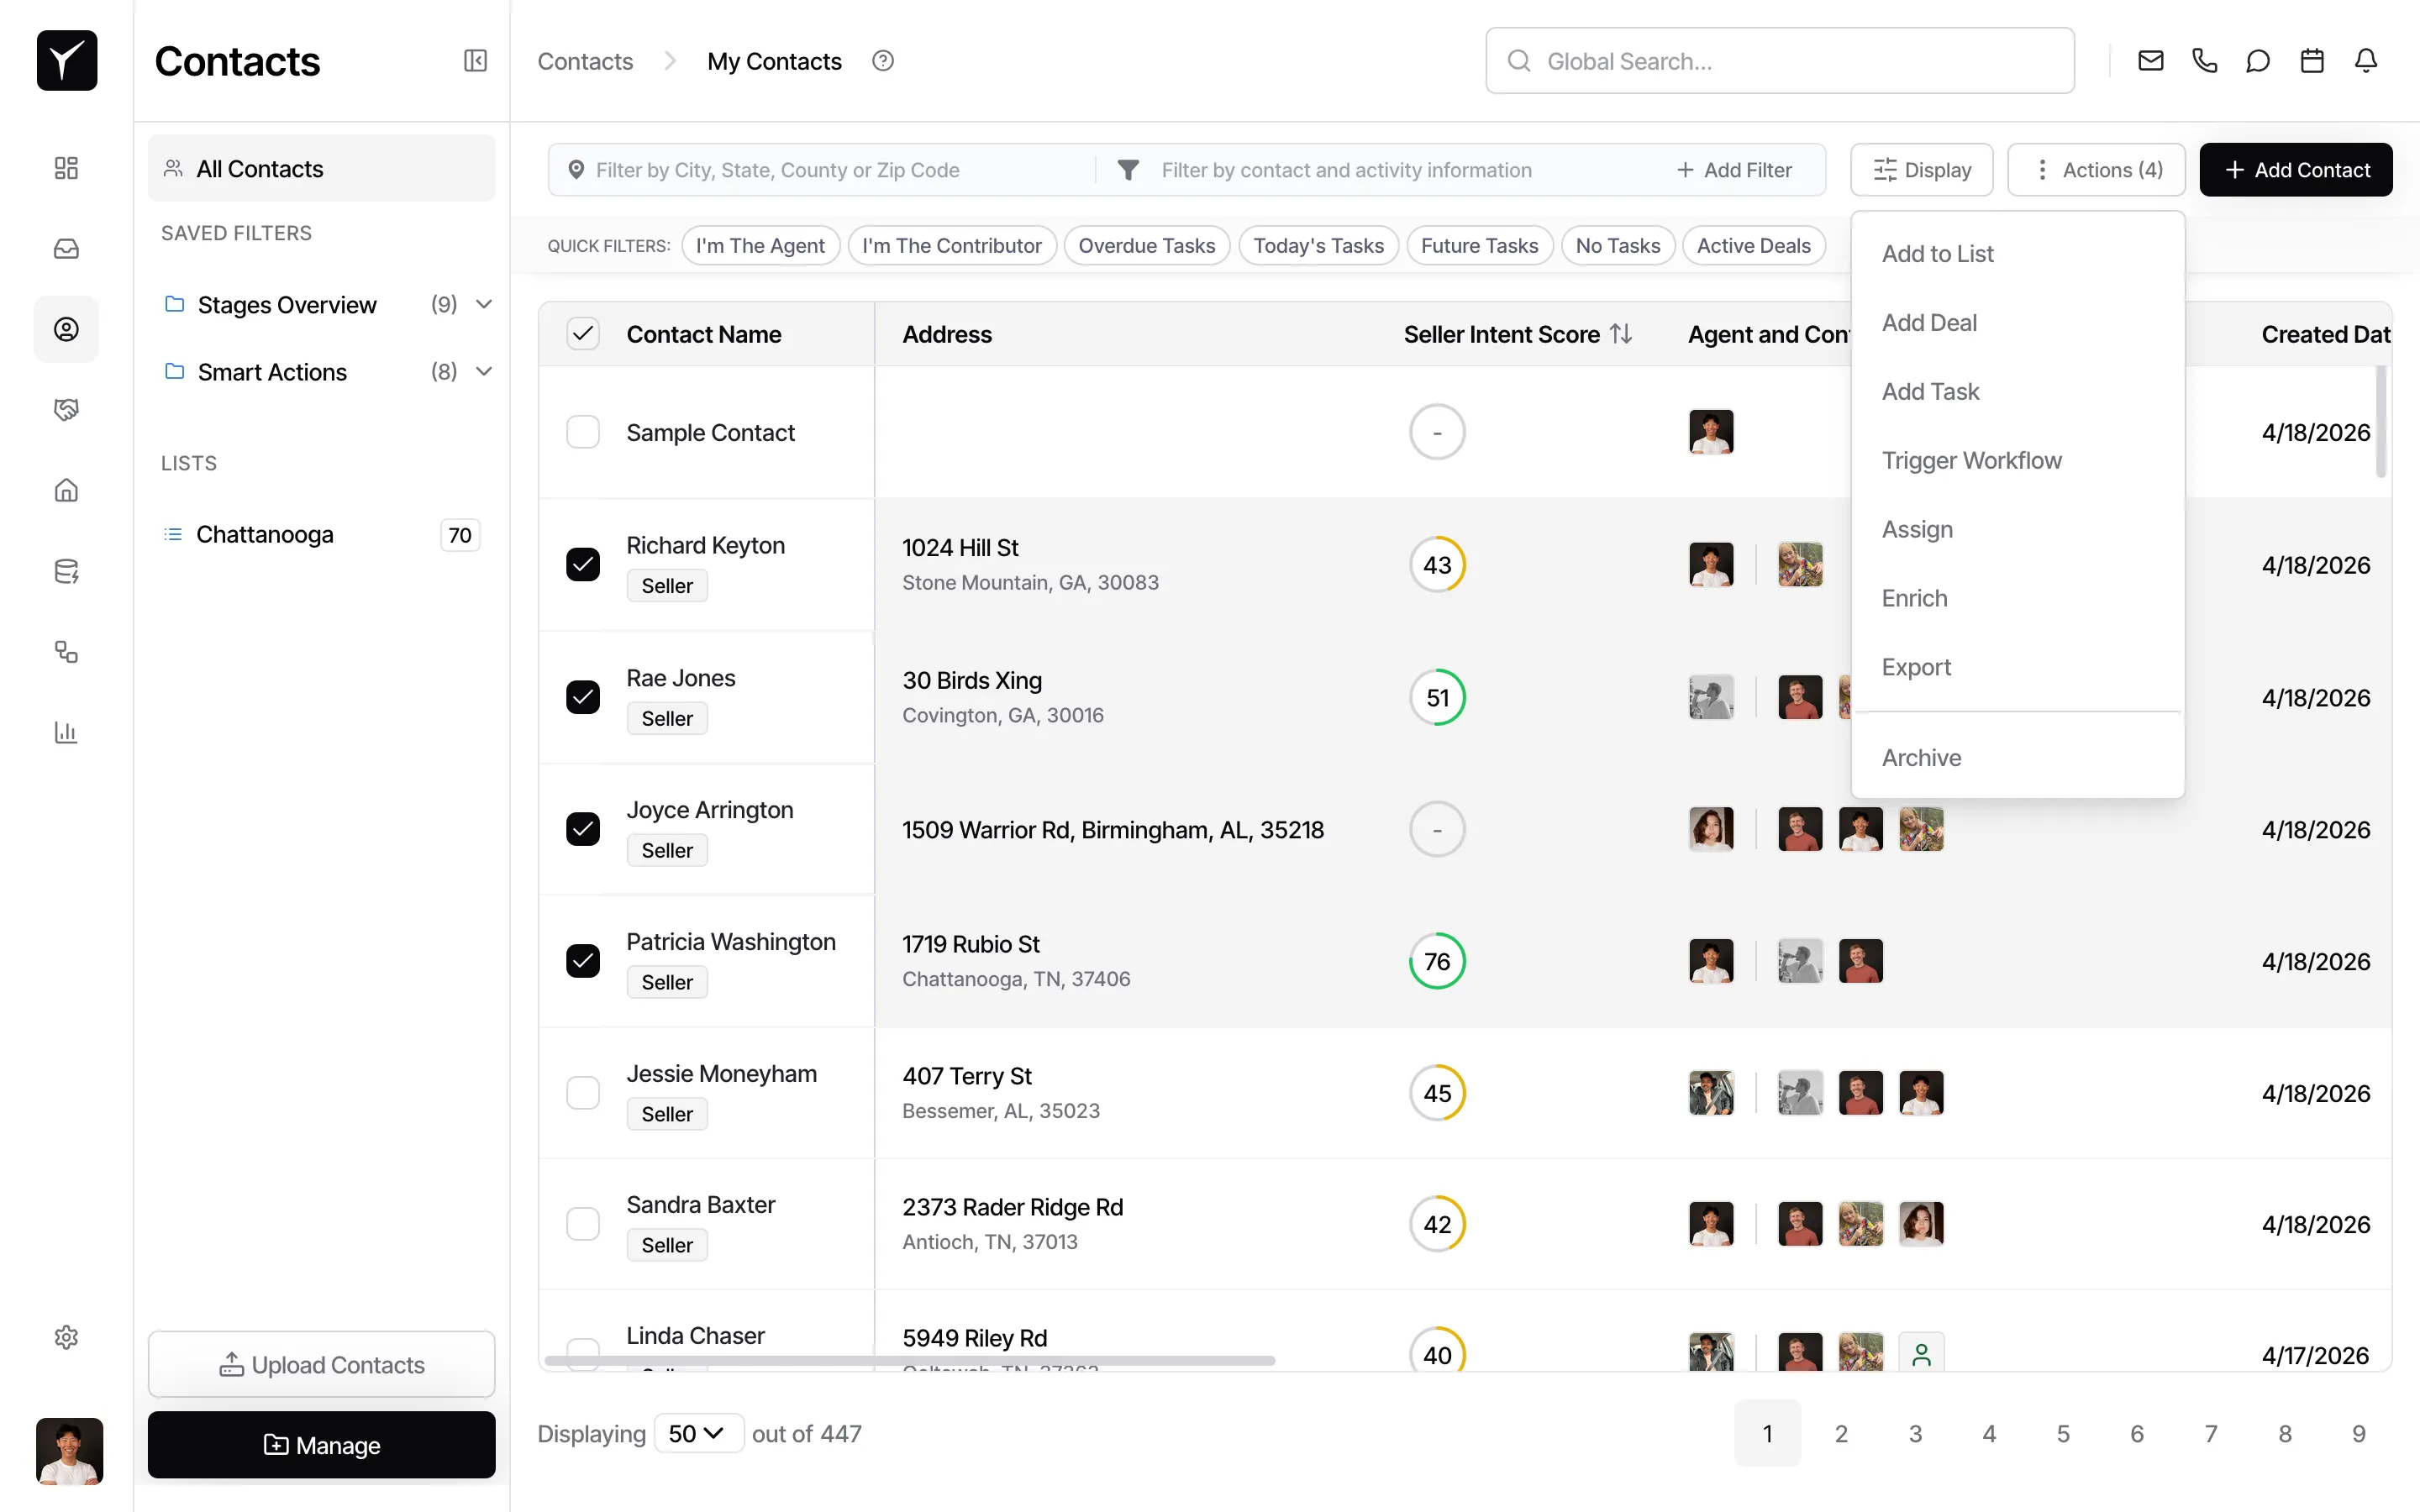
Select contacts and open Add Task
On the Contacts page, check the box next to each contact you want to assign a task to. Click the Actions dropdown and select Add Task.
-
Configure and create the tasks
The Bulk Task Creation modal opens. Enter a Task Name — use placeholders like
Contact,Address, orYour Full Nameto personalize each task. Select a Task Type, set the Due Date, Time, and Timezone. Choose an assignee or check Assign to current agents to route each task to the contact’s existing agent. Click Create Tasks when ready — Goliath creates one task per selected contact, each linked to their respective record.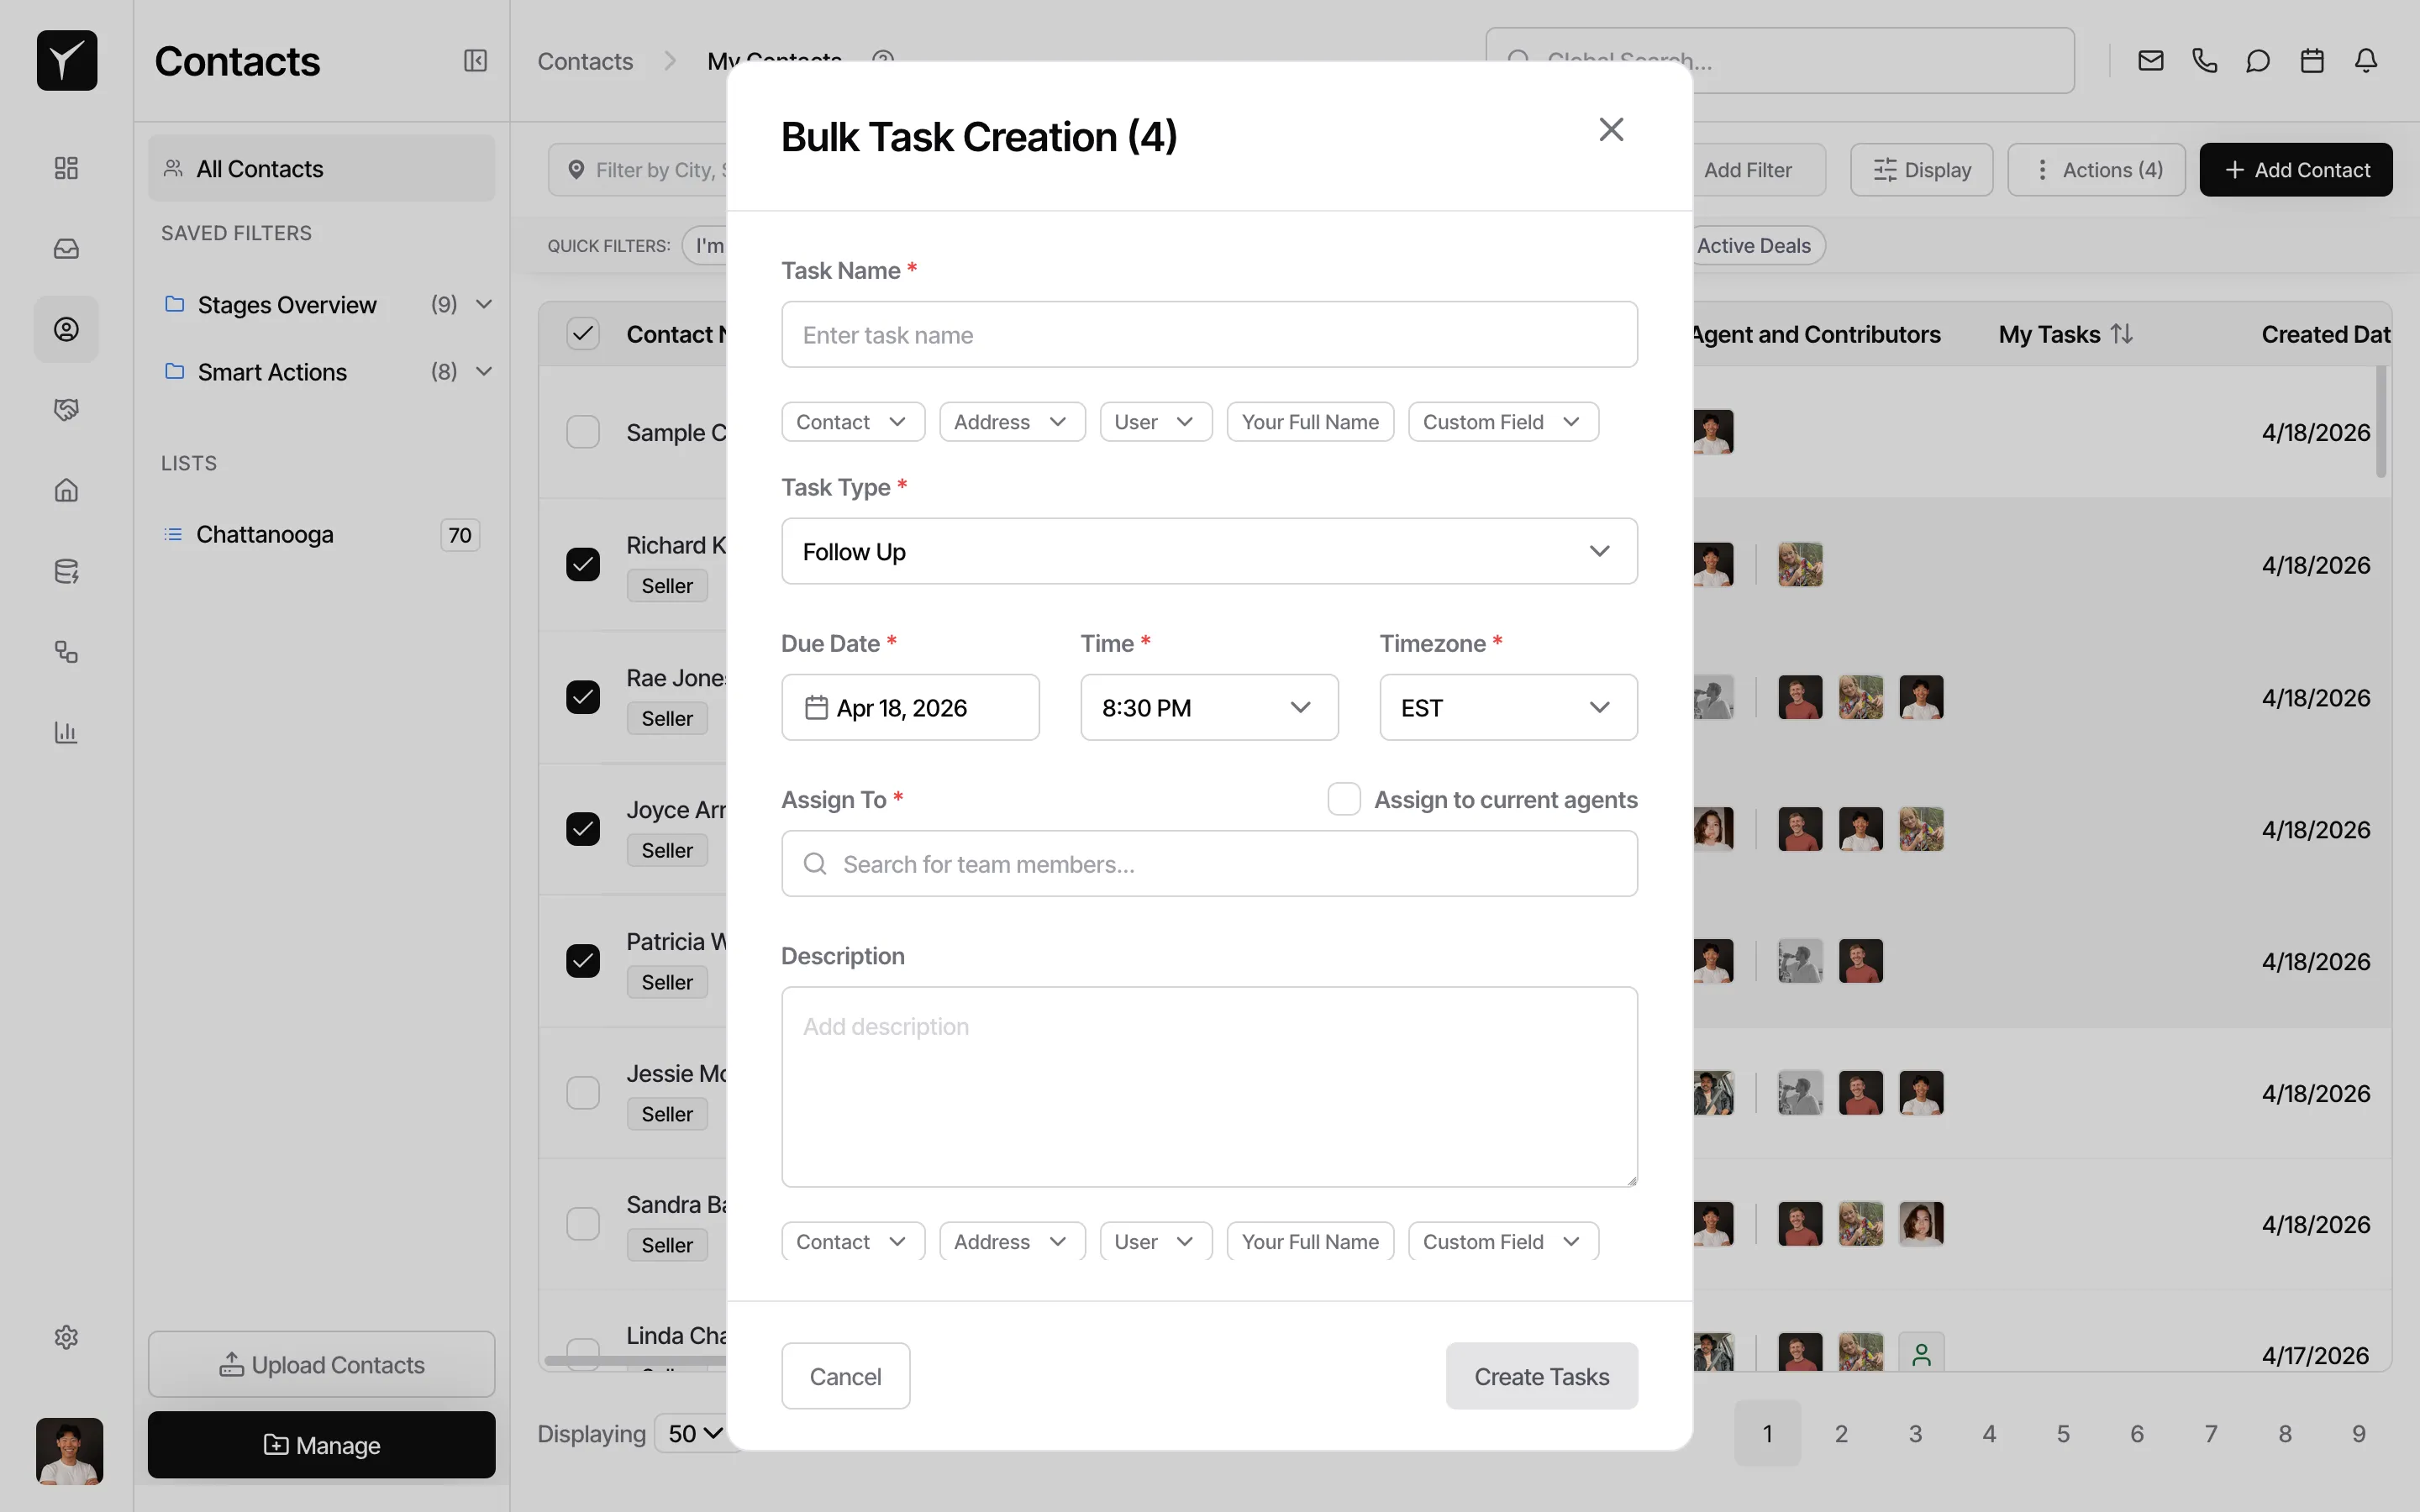
Frequently Asked Questions
Section titled “Frequently Asked Questions”Q: Can I create a task without linking it to a contact?
Section titled “Q: Can I create a task without linking it to a contact?”Yes. Navigate to the Tasks page in the left sidebar and click New Task. This creates a standalone task, but it won’t be linked to any contact, property, or deal, so you’ll lose the context and timeline visibility.
Q: Can I assign a task to multiple people?
Section titled “Q: Can I assign a task to multiple people?”No. Each task can only have one assignee. If you need multiple team members to complete the same action, create separate tasks for each person.
Q: Will the assignee get notified when I create a task for them?
Section titled “Q: Will the assignee get notified when I create a task for them?”Yes, as long as the assignee has task notifications enabled in their user preferences. Check Settings > Notifications to configure notification settings.
Q: Can a task have sub-tasks?
Section titled “Q: Can a task have sub-tasks?”Not natively. If you need to break down a large action, create multiple separate tasks and link them to the same contact or deal.
Q: How do I see all my overdue tasks?
Section titled “Q: How do I see all my overdue tasks?”On the Contacts page, click the Overdue Tasks quick filter button under the search bar. You can also navigate to the Tasks page in the left sidebar and filter by Overdue.
Q: Can I create tasks from workflows?
Section titled “Q: Can I create tasks from workflows?”Yes. Goliath workflows can automatically generate tasks based on triggers—for example, “when a new seller lead is created, create a follow-up call task assigned to the on-call acquisitions rep due in 1 day.” Learn more in the Creating a Workflow guide.