How Do I Add Contacts to a List?
Lists help you organize contacts into named groups for targeted outreach campaigns, such as “Houston Absentee Owners” or “Q2 Direct Mail Campaign”. A single contact can belong to multiple lists at once, and lists can be used to trigger automation workflows or filter your contacts table with a single click from the left sidebar.
Step-by-Step Guide
Section titled “Step-by-Step Guide”-
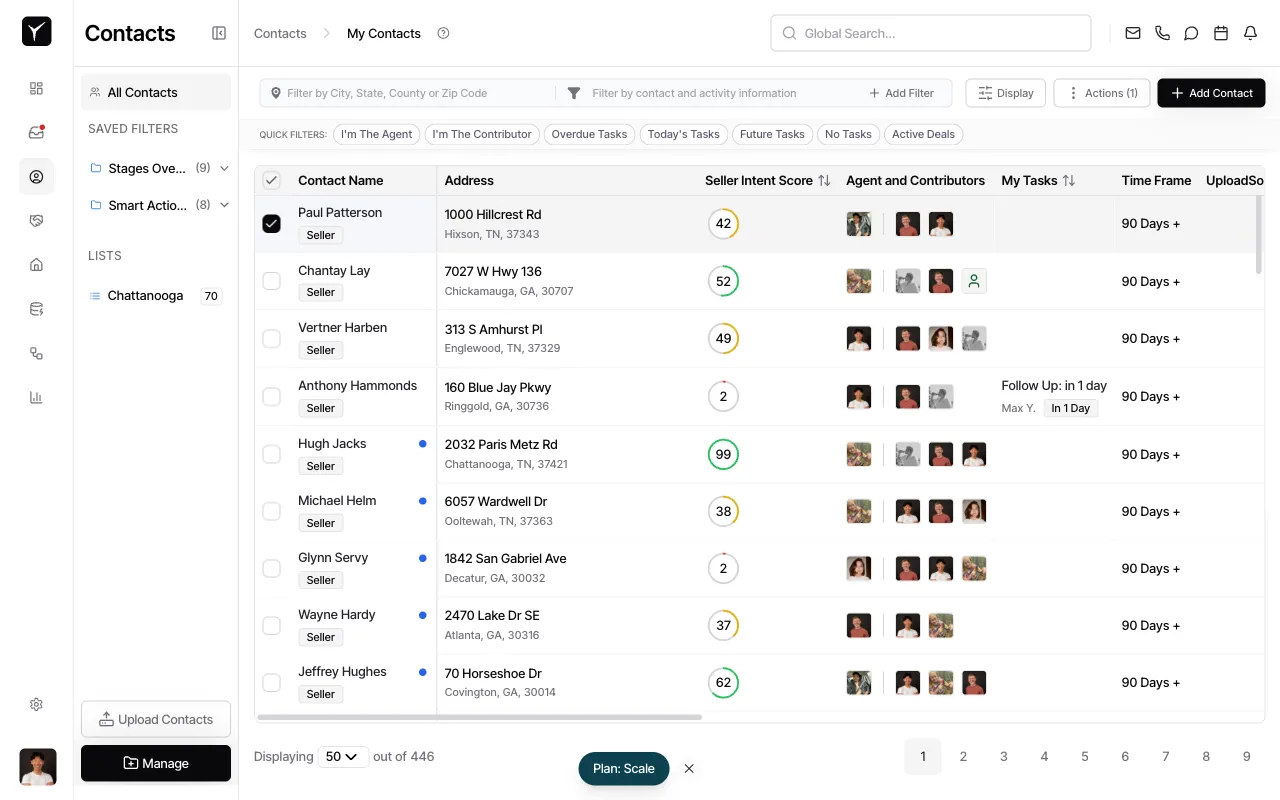
Select the contact(s) you want to add to a list
Click the checkbox next to one or more contact names in the contacts table. The checkbox column appears on the far left of each row.
-
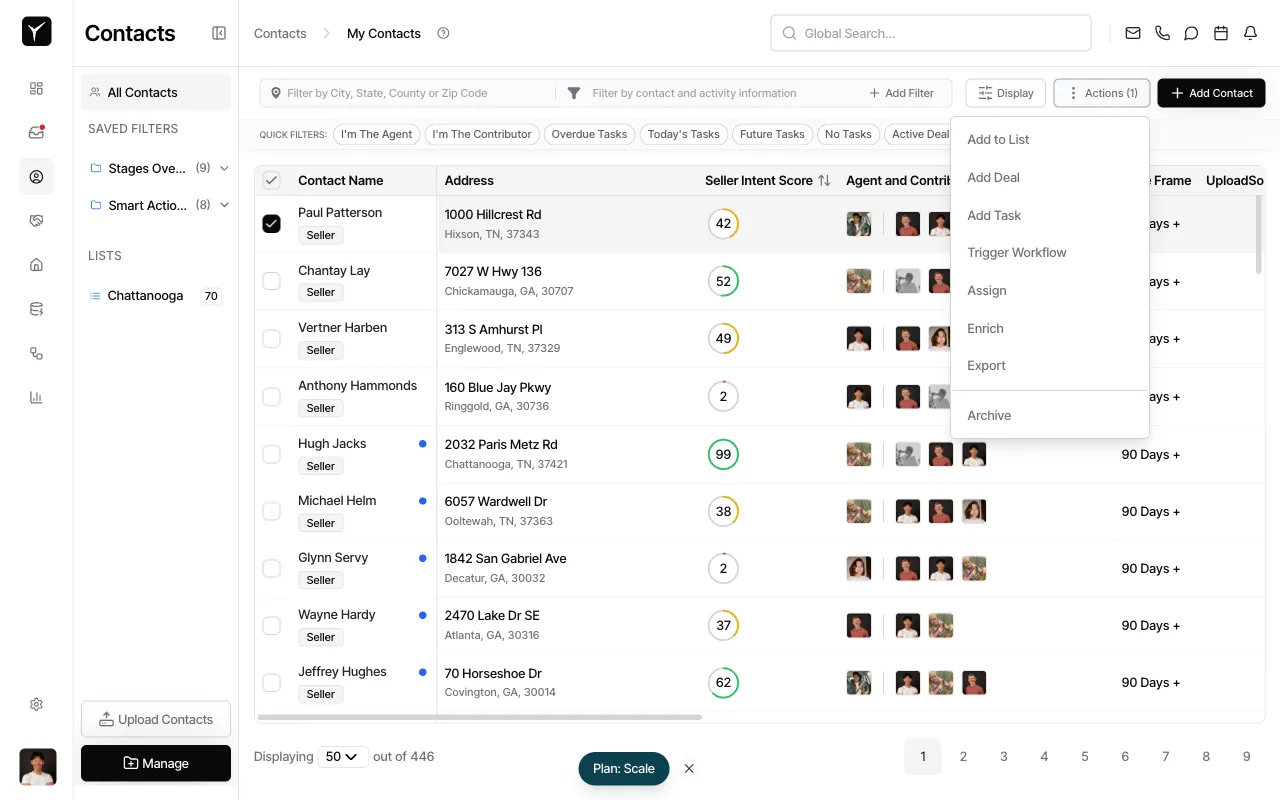
Open Actions and choose “Add to List”
Click the Actions button in the toolbar, then select Add to List from the dropdown. This opens the list selection dialog.
-
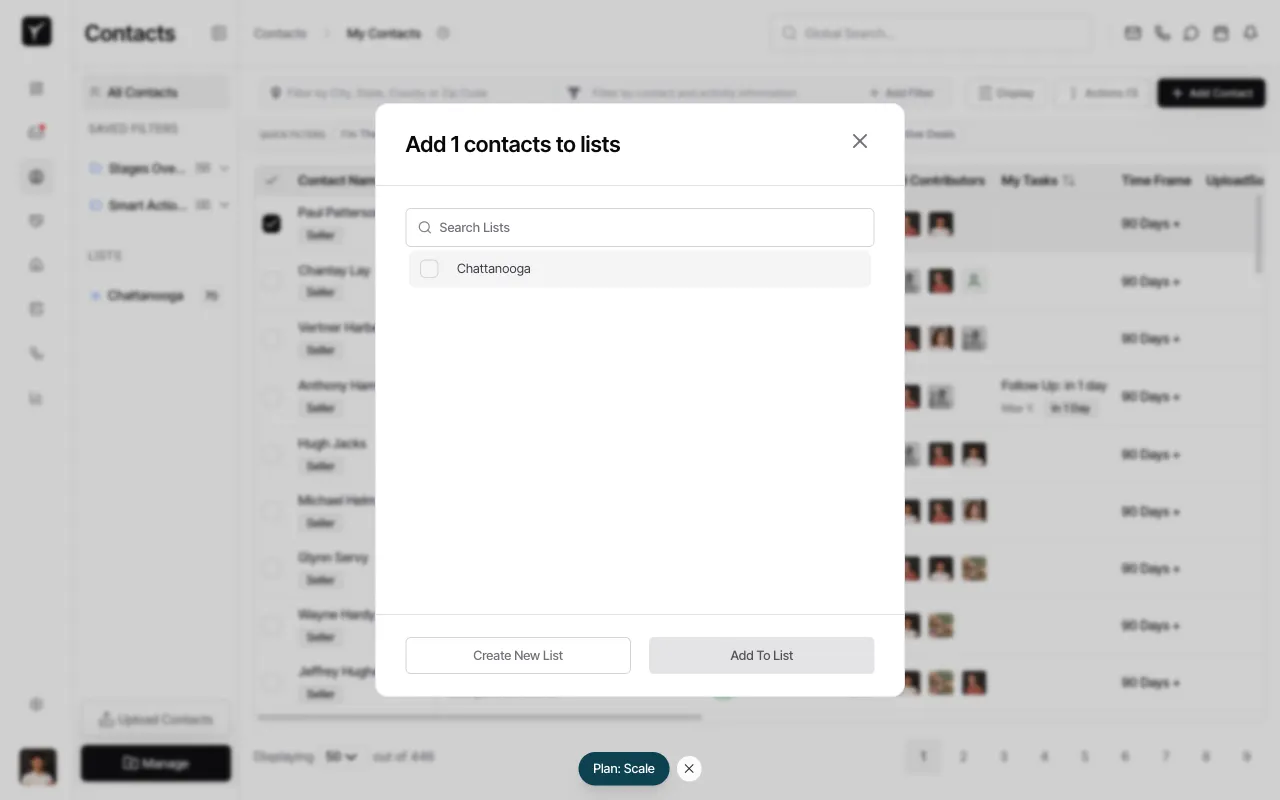
Select an existing list or create a new one
In the dialog, you can search for an existing list by name or check the box next to the list you want. To create a new list instead, click Create New List at the bottom of the dialog. Once you’ve made your selection, click Add To List to confirm.
Frequently Asked Questions
Section titled “Frequently Asked Questions”Q: Can a contact belong to more than one list?
Section titled “Q: Can a contact belong to more than one list?”Yes. A single contact can be added to as many lists as you need, making it easy to segment your audience in multiple ways.
Q: How do I remove a contact from a list?
Section titled “Q: How do I remove a contact from a list?”Open the contact’s detail view, find the list in the contact’s profile, and remove it from there. You can also use filters and bulk actions to remove multiple contacts from a list at once.
Q: Where can I see all my lists?
Section titled “Q: Where can I see all my lists?”All your lists appear in the left sidebar under the LISTS section. Click any list name to filter the contacts table to show only contacts in that list.