Custom Fields for Contacts
Custom fields let you capture data specific to your workflow beyond the built-in contact properties like name, phone, and address. Use custom fields to track lead source, motivation level, preferred contact method, or any other information that matters to your team. Once created, custom fields appear on every contact’s detail panel and can be used in filters, exports, and workflow triggers.
Step-by-Step Guide
Section titled “Step-by-Step Guide”-
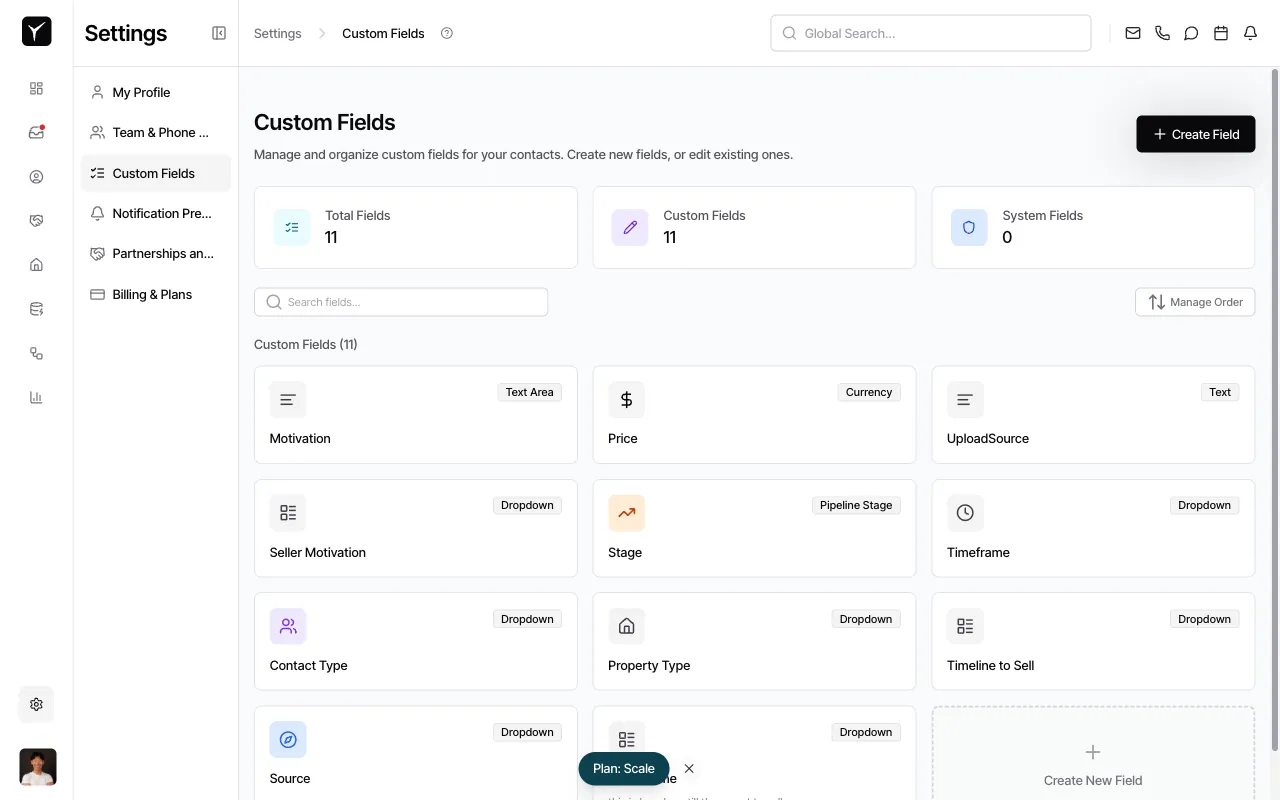
Navigate to Custom Fields settings
From the left sidebar, click Settings, then select Custom Fields from the settings menu.
-
Review existing custom fields
The Custom Fields page displays all fields currently configured for your organization. You’ll see the field name, type (Text, Dropdown, Currency, etc.), and an icon representing each field type. The page shows both the total number of fields and a breakdown of custom versus system fields.
-
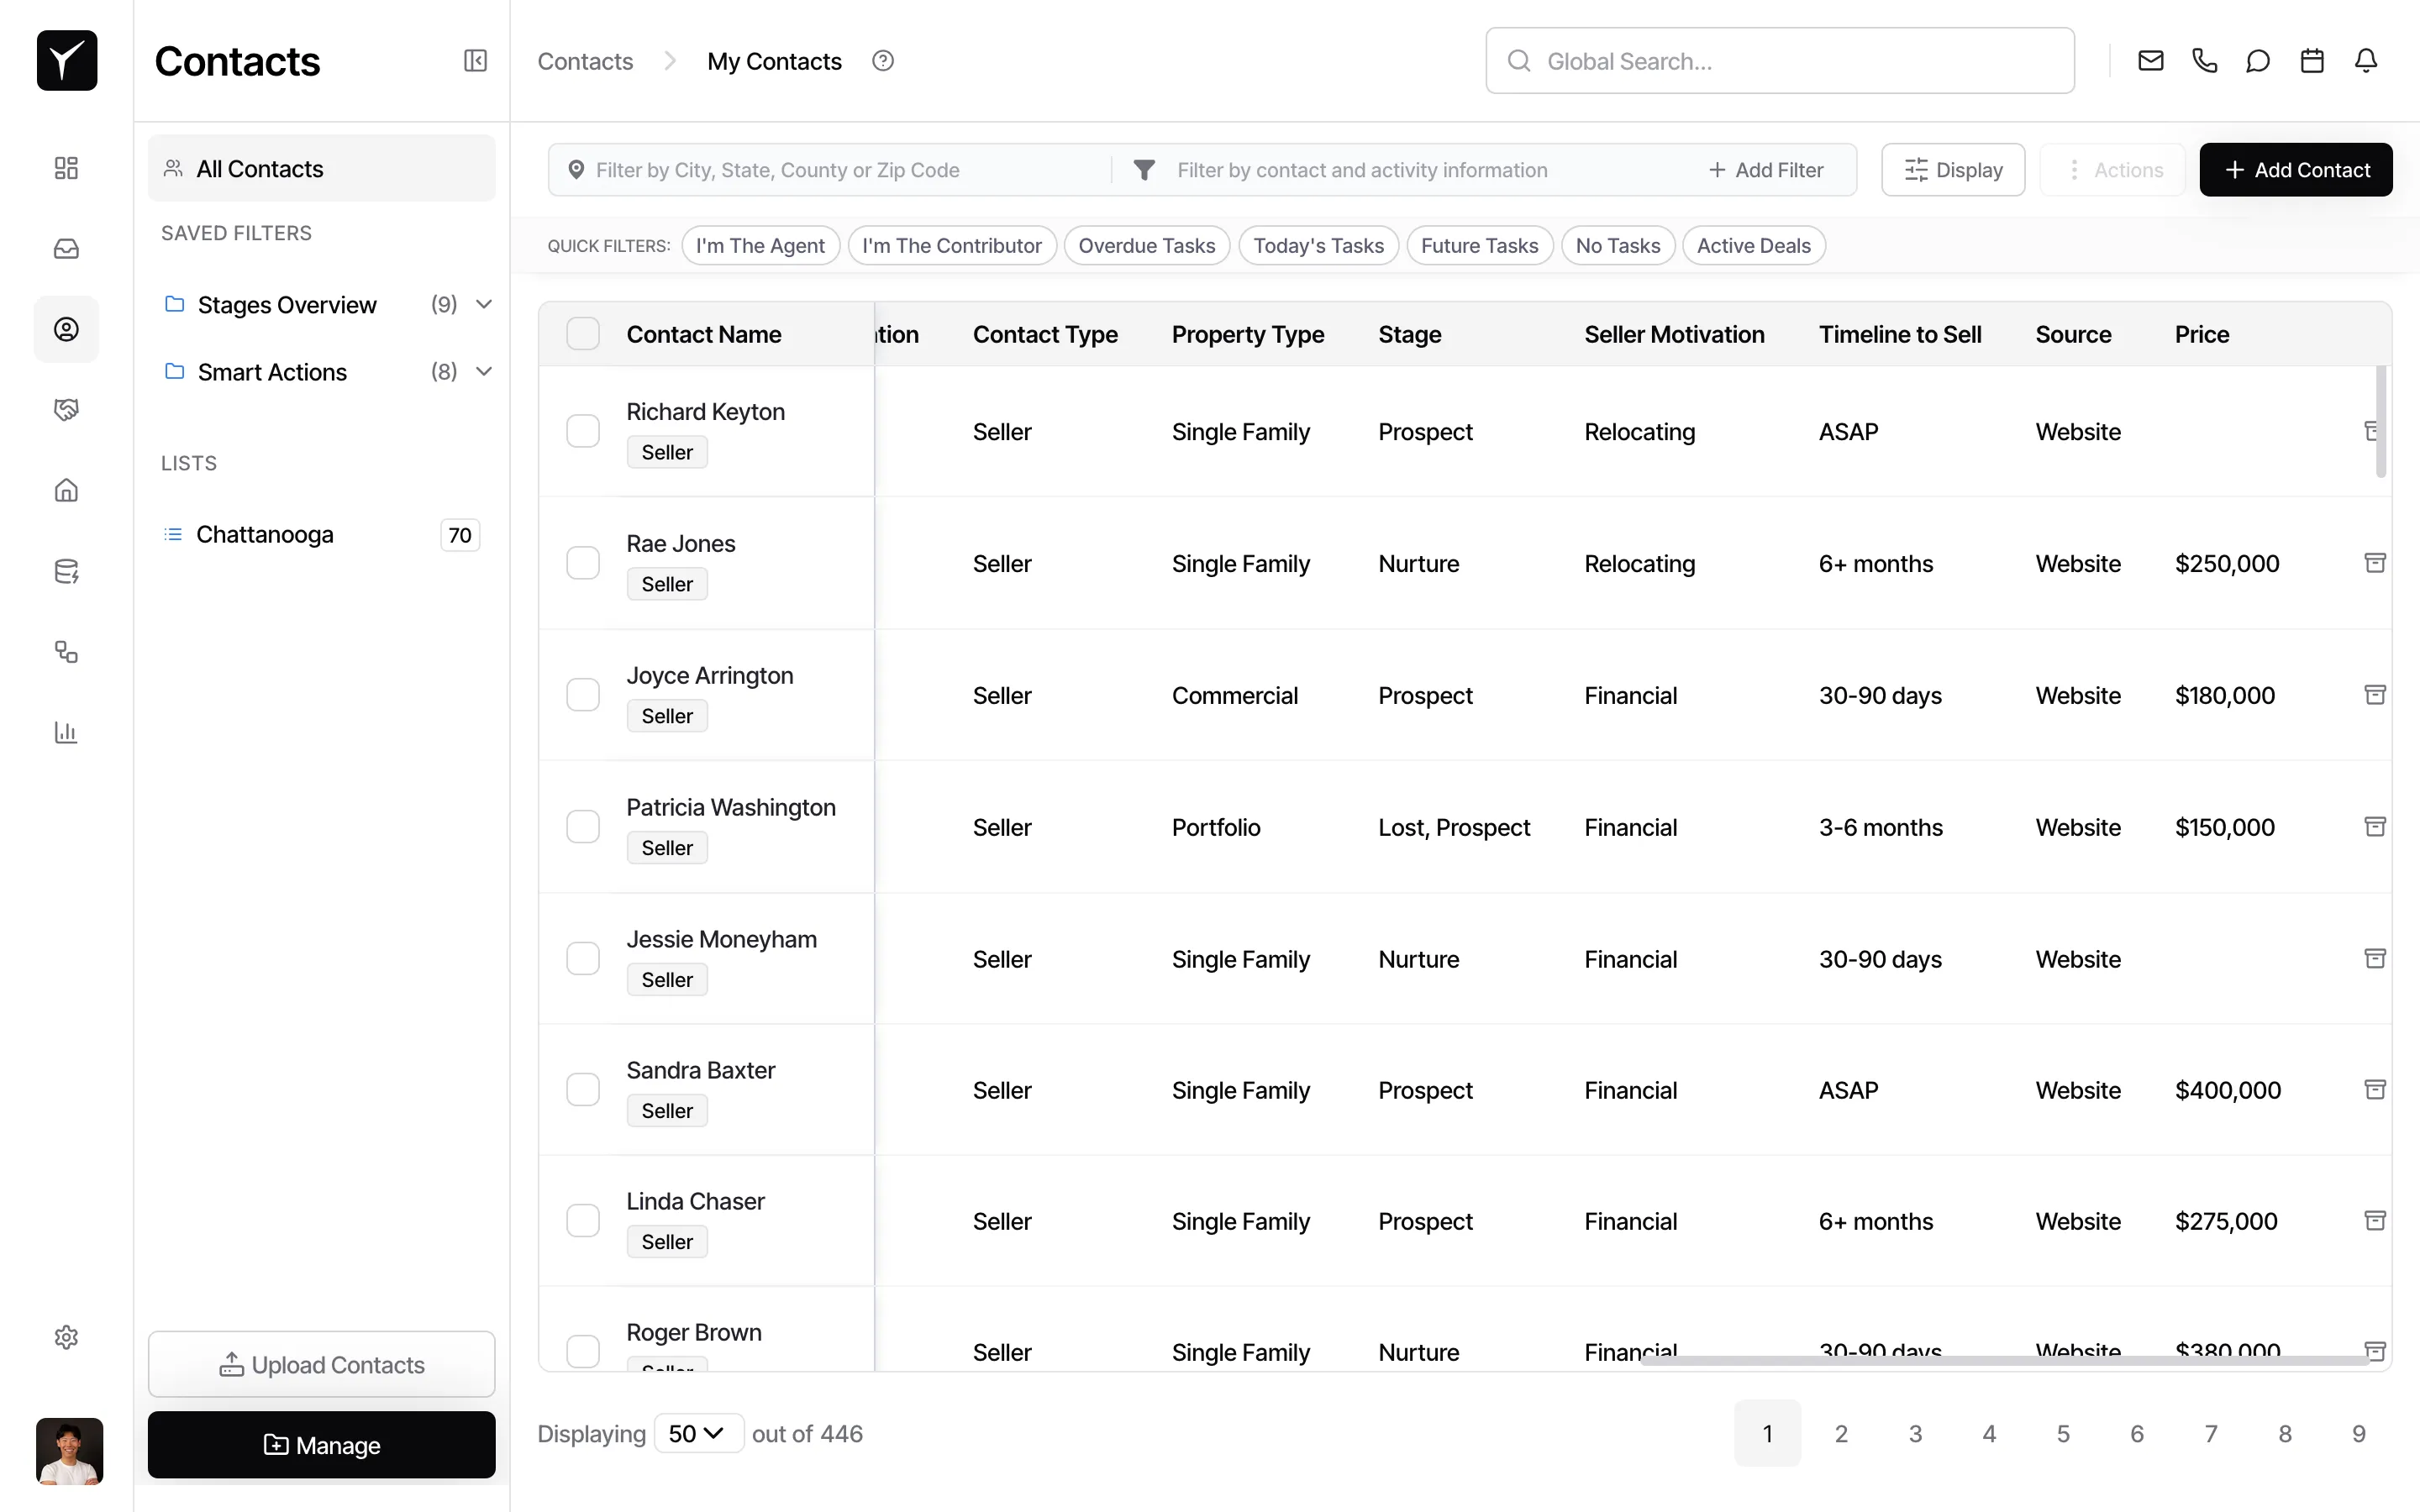
View custom fields on the Contacts list
Navigate to Contacts in the left sidebar. Your custom fields appear as columns in the contacts table, allowing you to see field values at a glance. Columns like Property Type, Stage, Seller Motivation, and Timeline to Sell appear alongside standard fields like Contact Name and Contact Type.
-
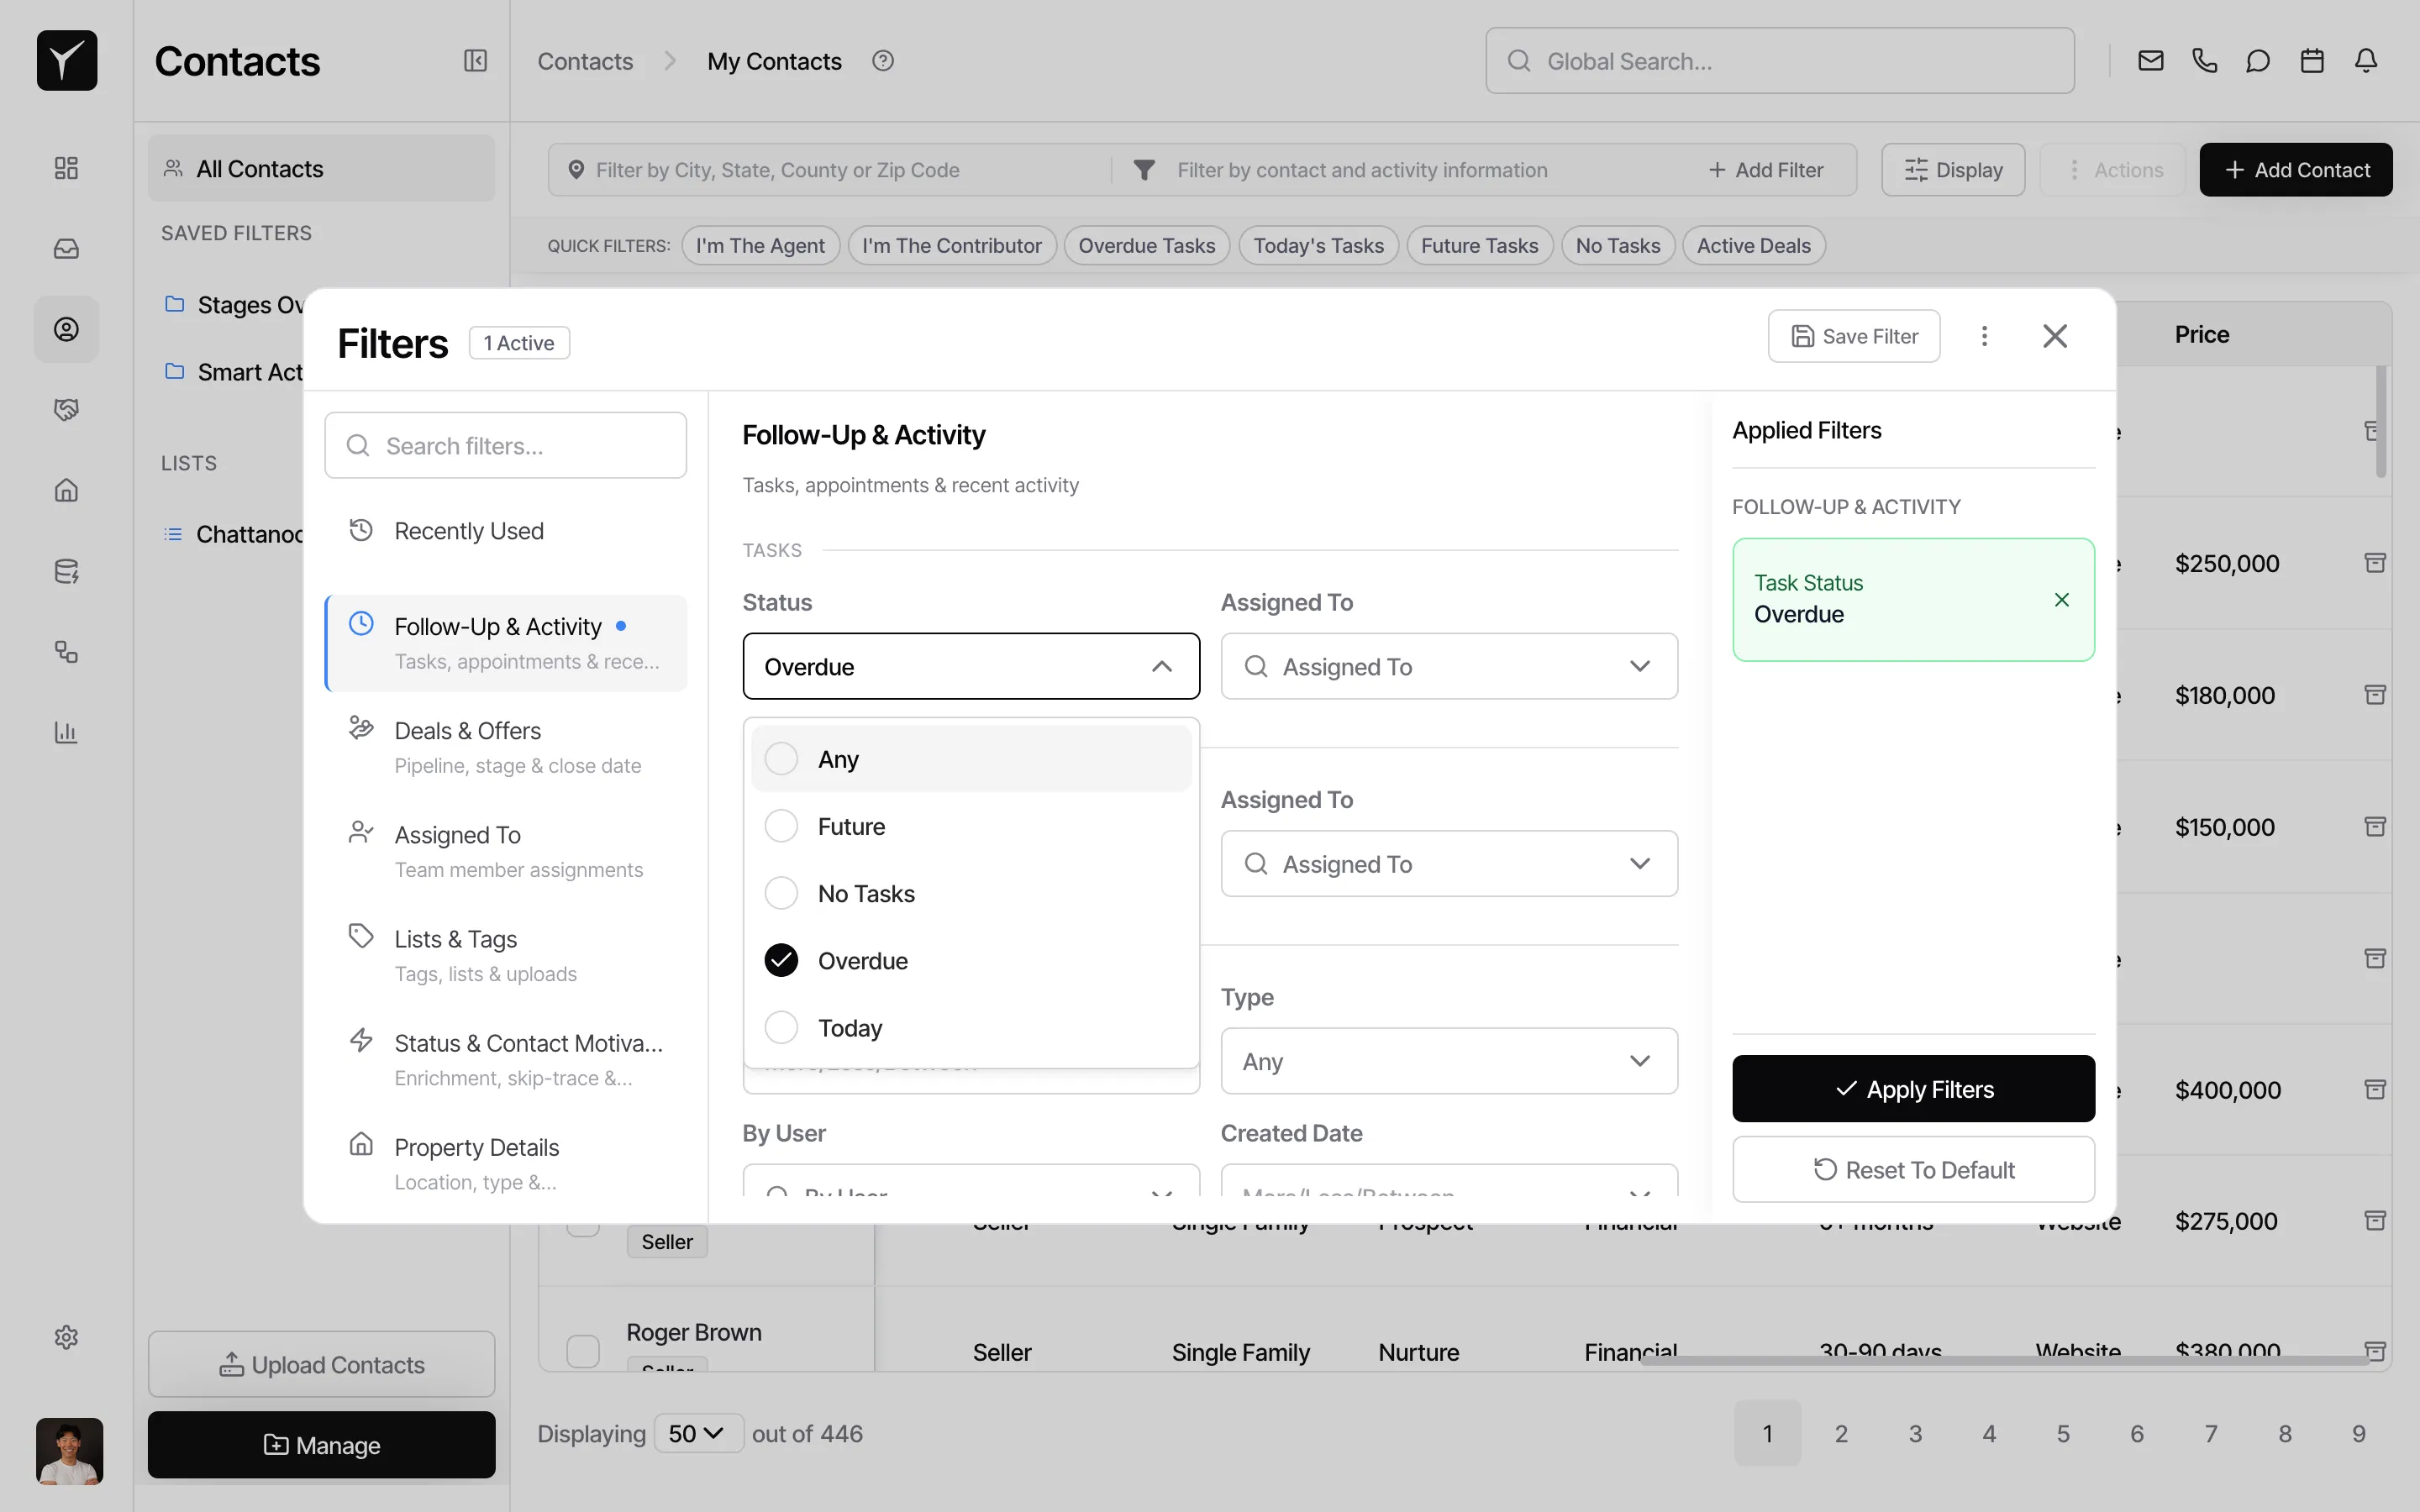
Access the filter panel
To filter contacts by custom field values, click the Filter by contact and activity information button in the toolbar. The filter panel opens, showing categories including Follow-Up & Activity, Deals & Offers, Assigned To, Lists & Tags, Status & Contact Motivation, and Property Details.
-
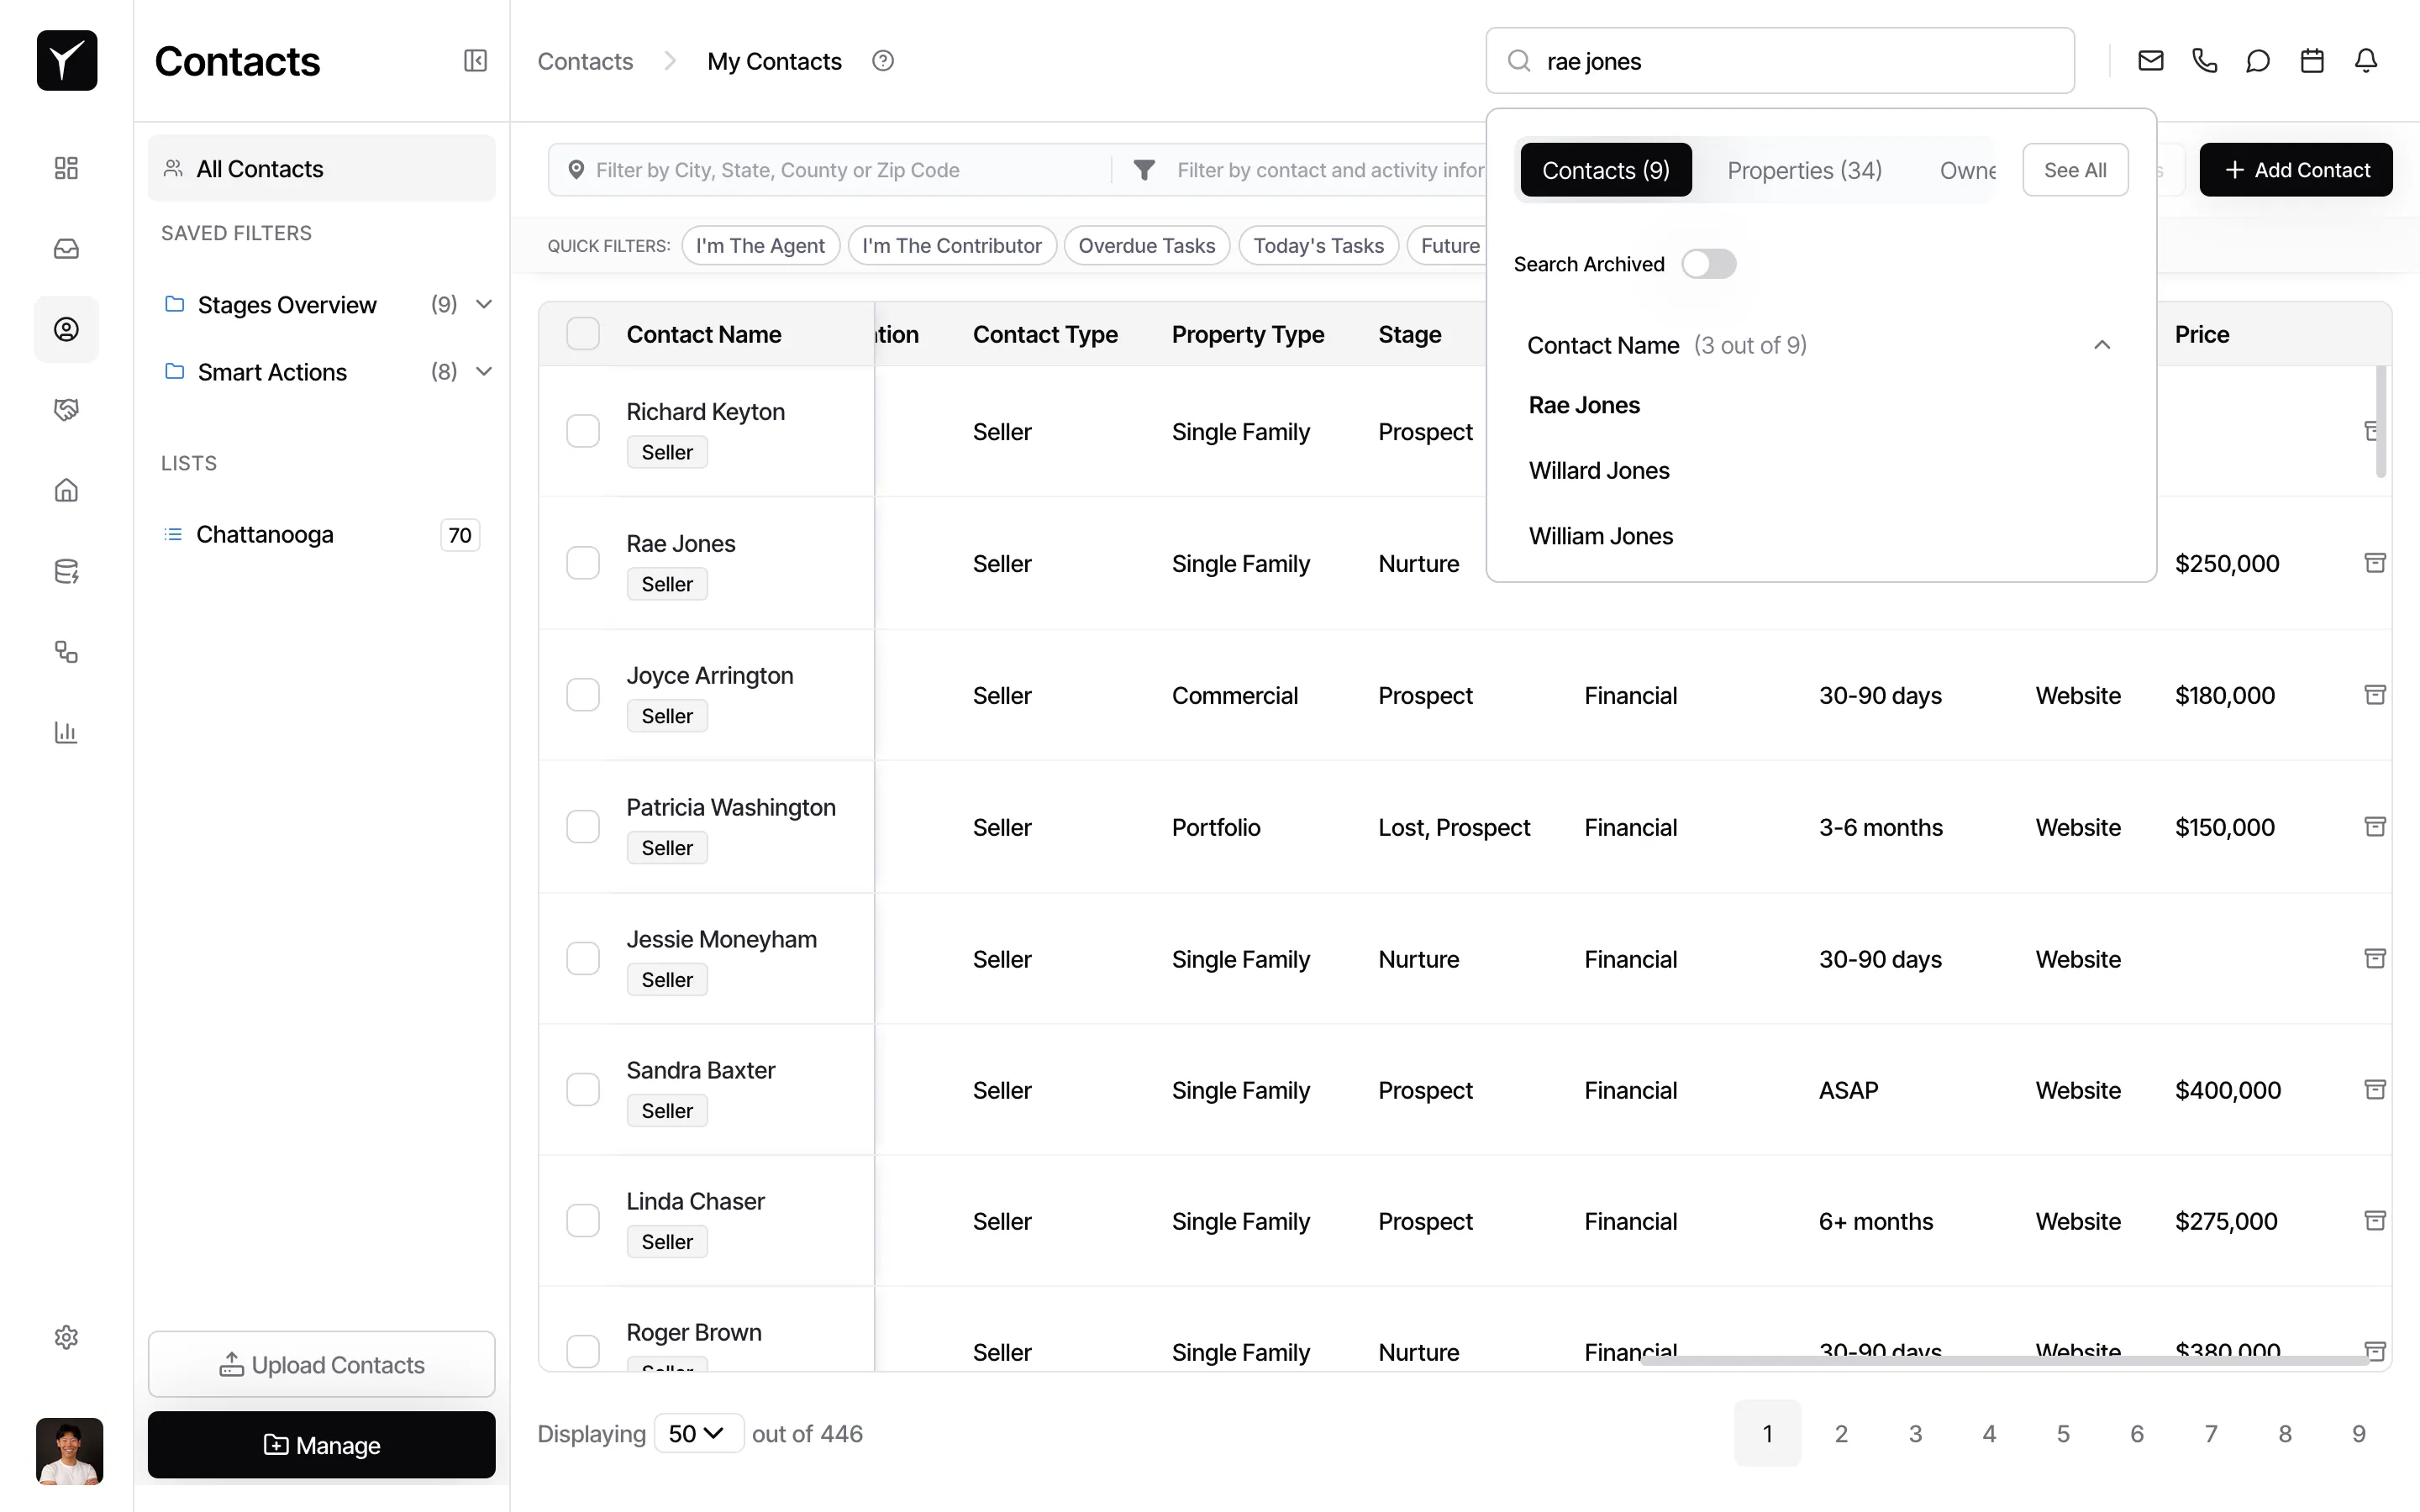
Use the Global Search
You can also search for specific contacts using the Global Search bar at the top of the page. Type a contact name to quickly locate a record—results are grouped by Contacts, Properties, and Owners as you type.
-
Open a contact detail panel
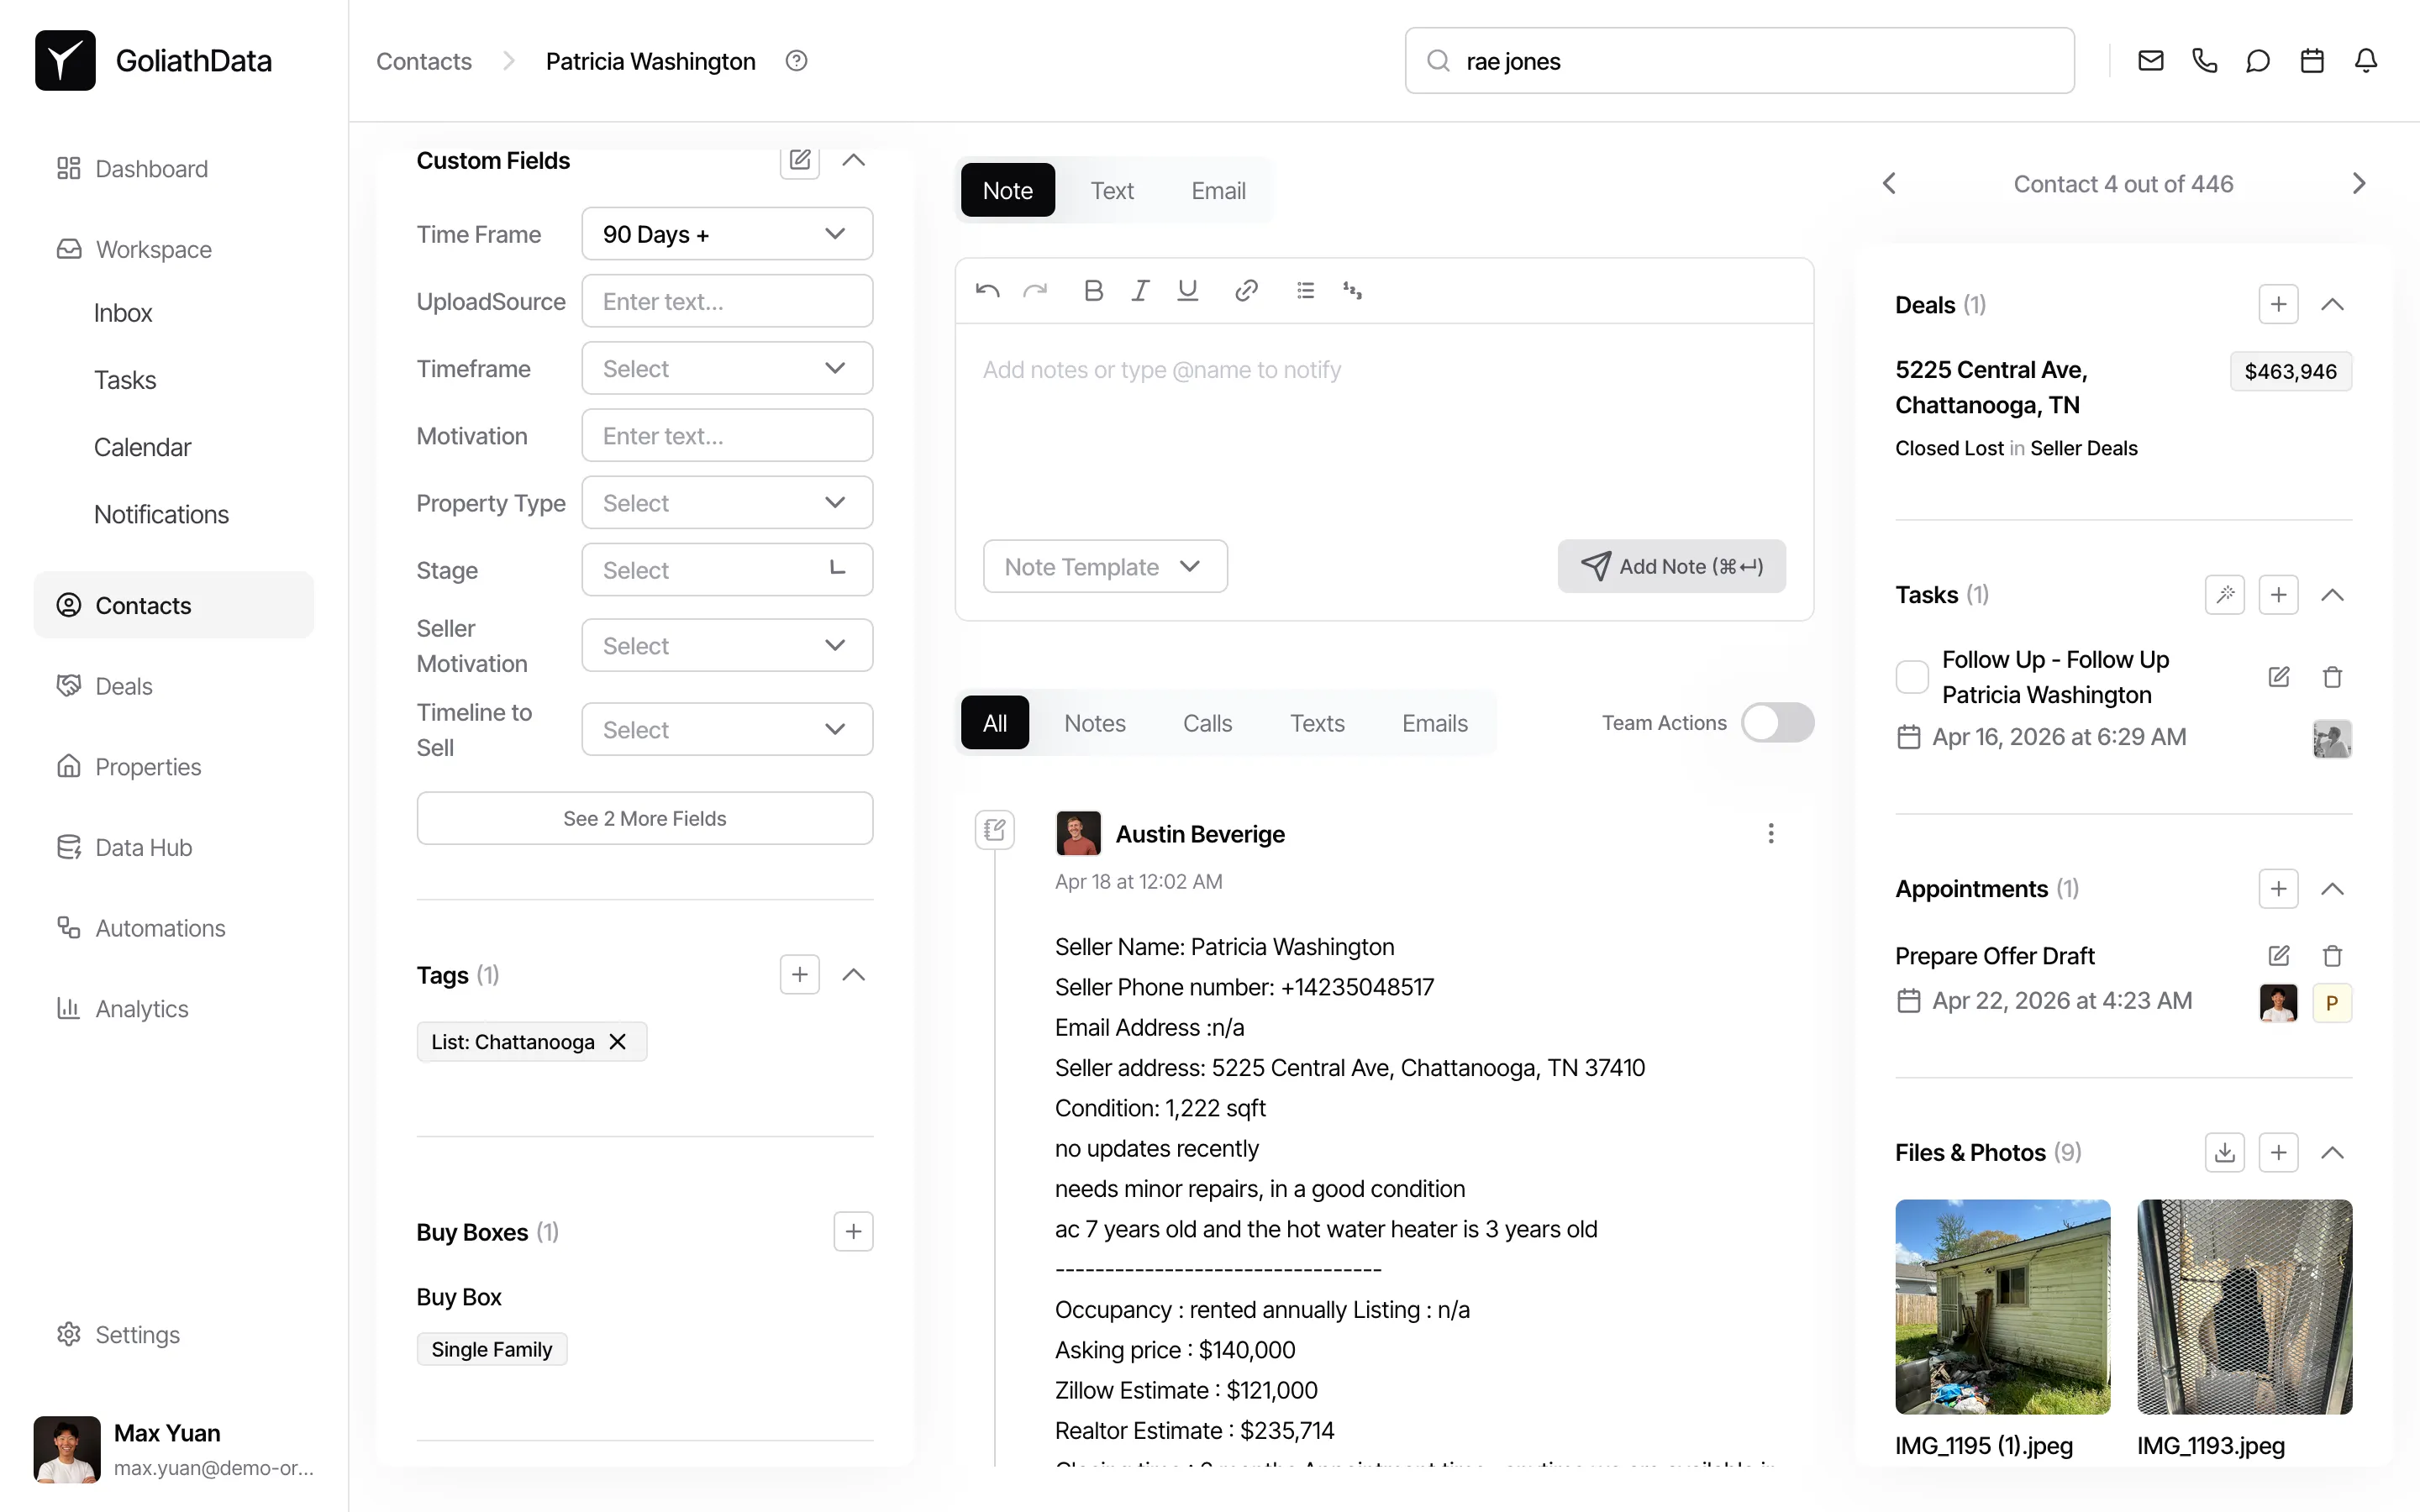
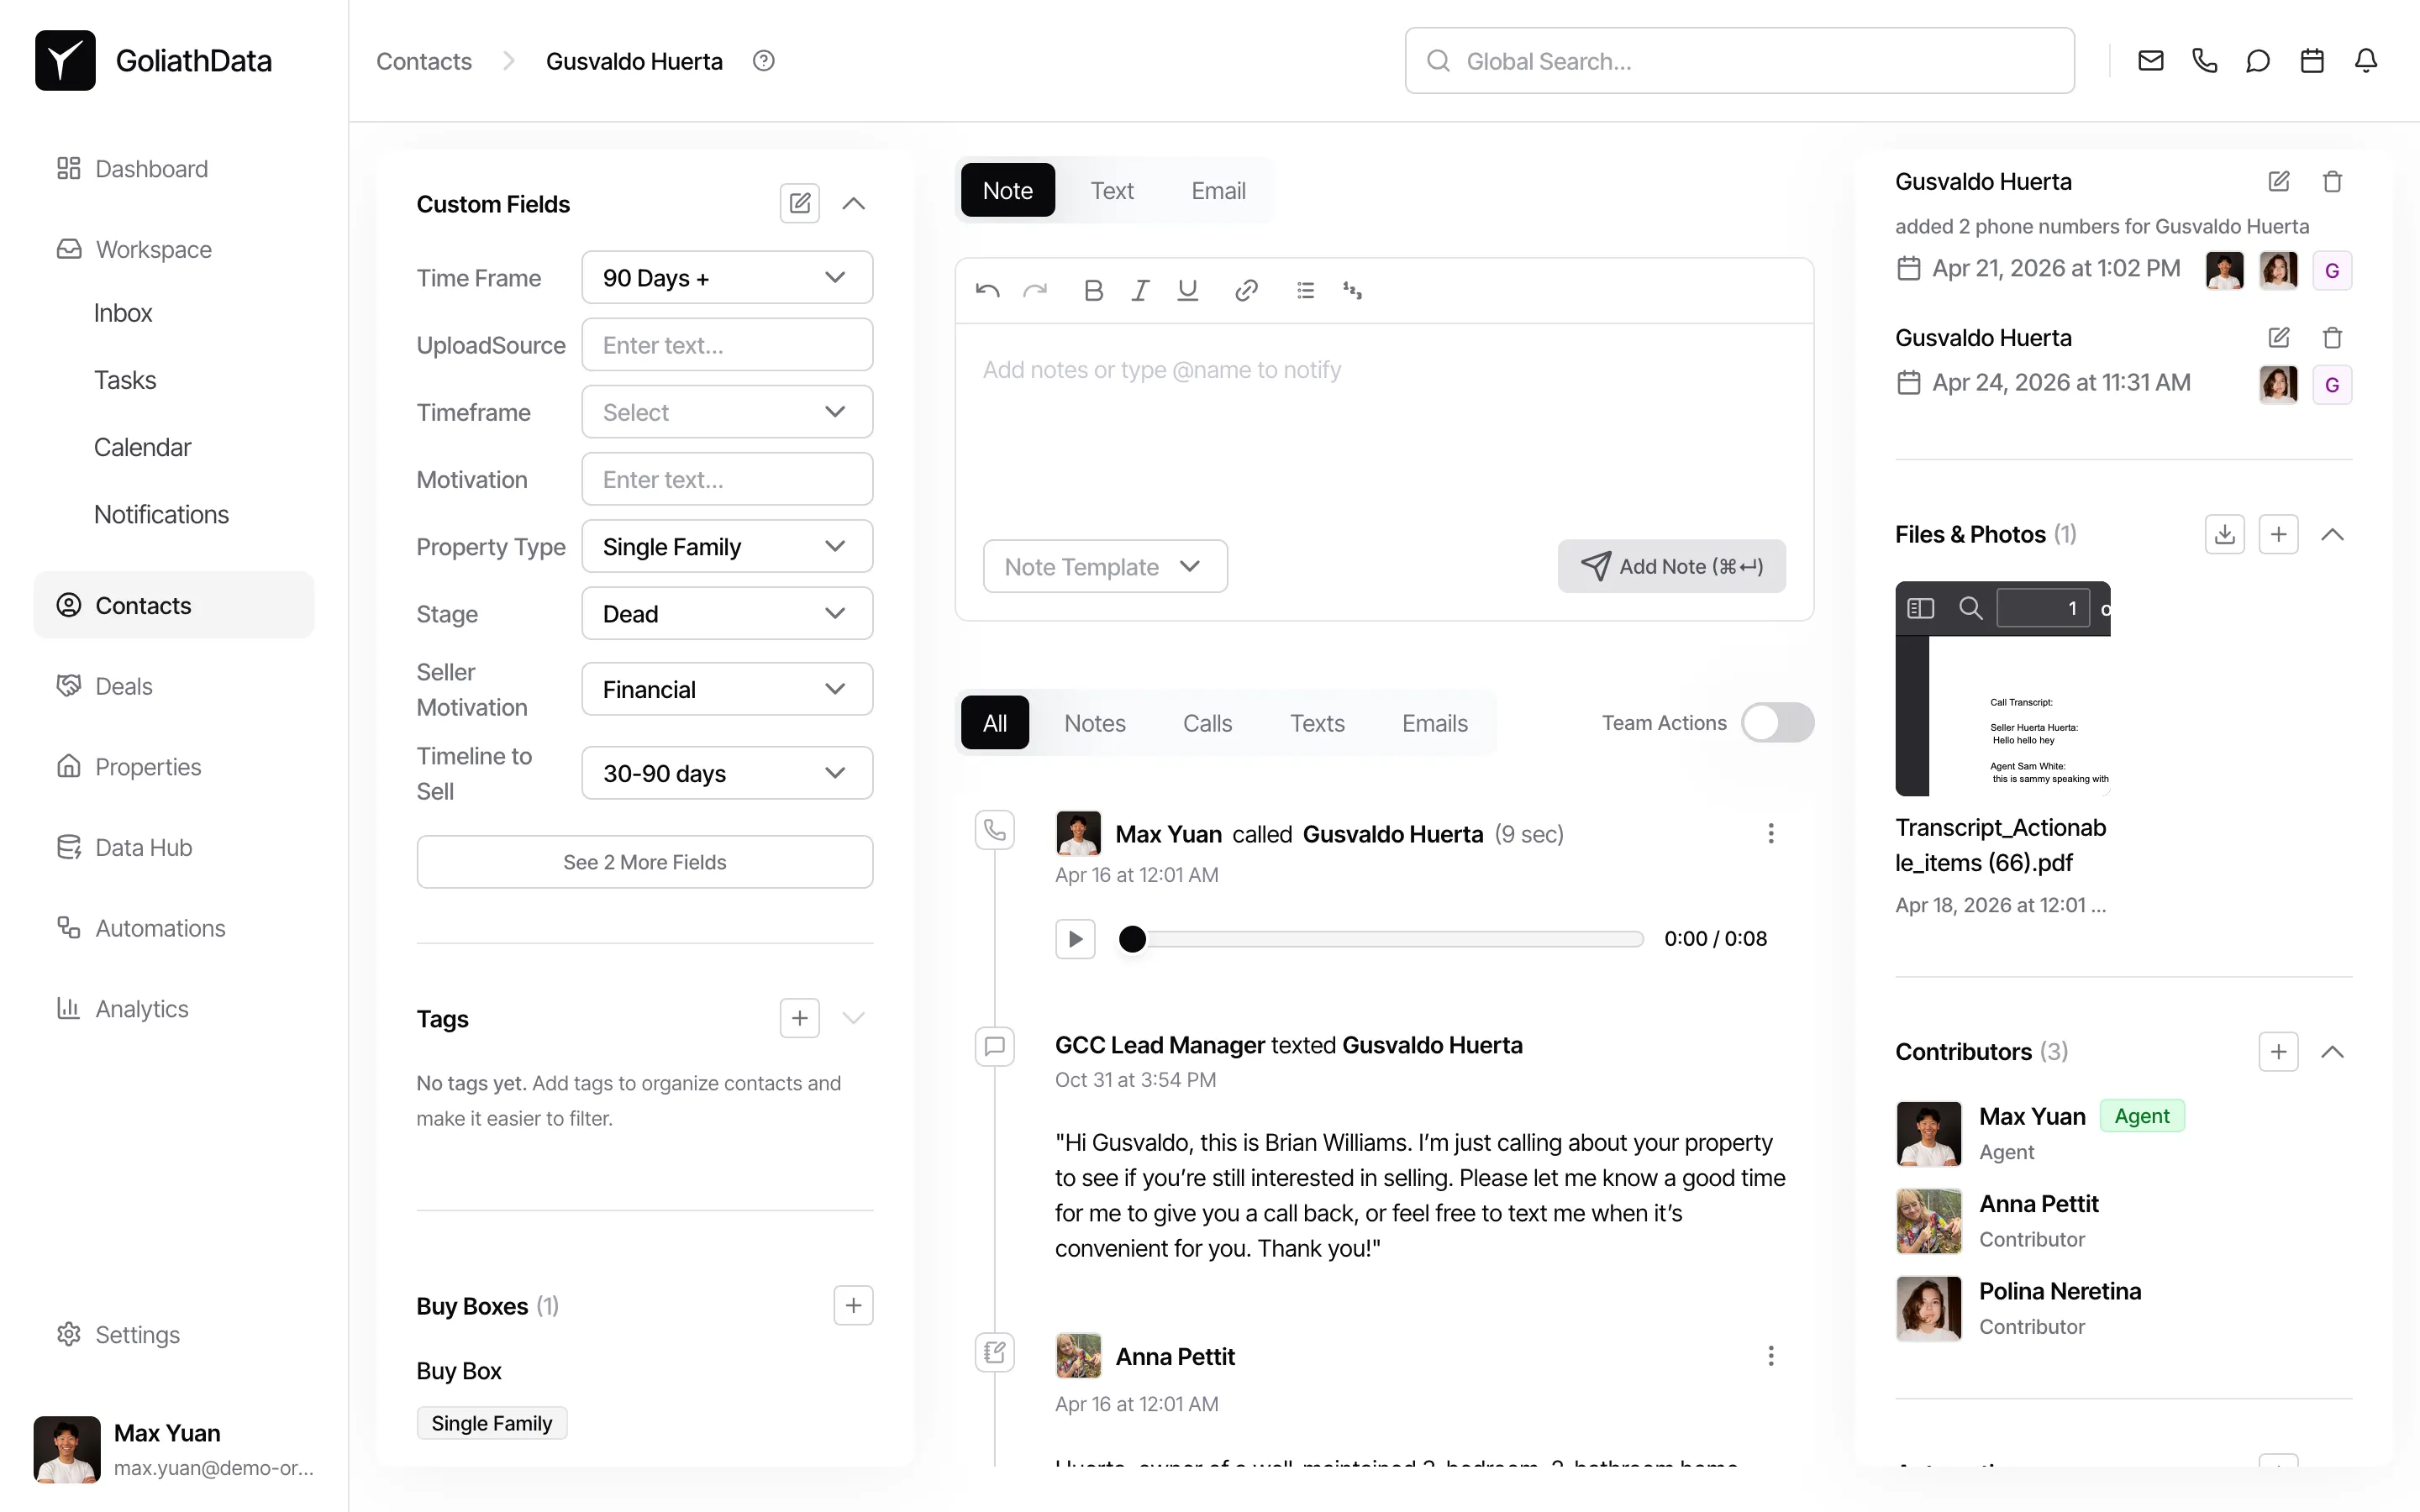
Click any contact name in the list to open their detail panel. The Custom Fields section appears in the left column, displaying all custom fields configured for your organization with their current values.
-
Edit custom field values
In the Custom Fields section, you can view and update values for each field. Dropdown fields display a Select control, text fields show an input box, and other field types display appropriate controls. Click the edit icon next to Custom Fields to modify multiple values at once.
Frequently Asked Questions
Section titled “Frequently Asked Questions”Q: What field types are supported?
Section titled “Q: What field types are supported?”Goliath supports text, number, date, single-select dropdown, multi-select, and boolean/checkbox field types.
Q: Can I use custom fields in filters and exports?
Section titled “Q: Can I use custom fields in filters and exports?”Yes. Custom fields appear in the filter panel and can be included in CSV exports, making them a powerful segmentation and reporting tool.
Q: Who can create or delete custom fields?
Section titled “Q: Who can create or delete custom fields?”Only organization admins can create, rename, or delete custom fields. All team members can view and update field values on contact records.