How to Create a Pipeline
Pipelines organize your deals into stages that reflect your real-world sales process. Each pipeline can have its own set of stages, from initial contact through closing, and you can create multiple pipelines to track different deal types (e.g., seller leads, buyer prospects, wholesale deals). Pipelines are visible to your entire team and help everyone understand where each deal stands.
Step-by-Step Guide
Section titled “Step-by-Step Guide”-
Open the Manage Pipelines dialog
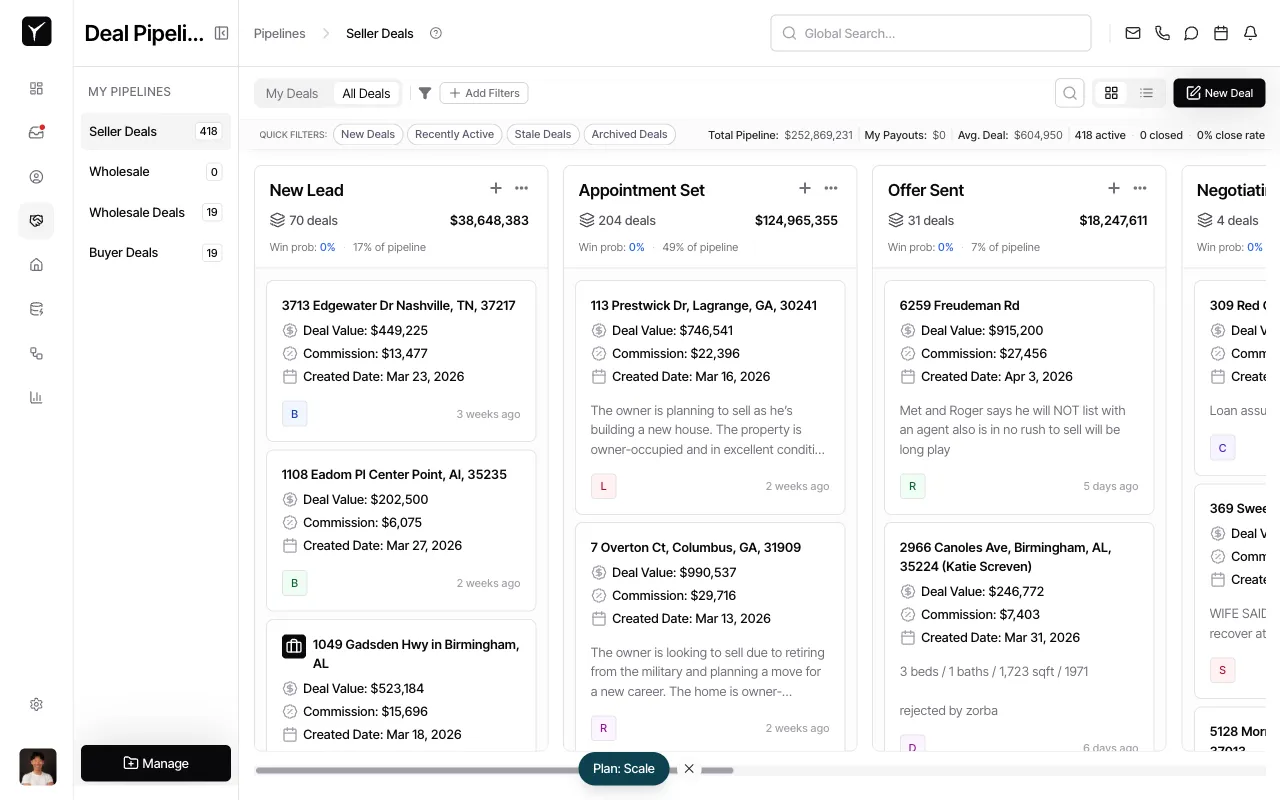
From the sidebar, click Manage to access pipeline management. This opens the central hub where you can view all existing pipelines and create new ones.
-
Click New Pipeline
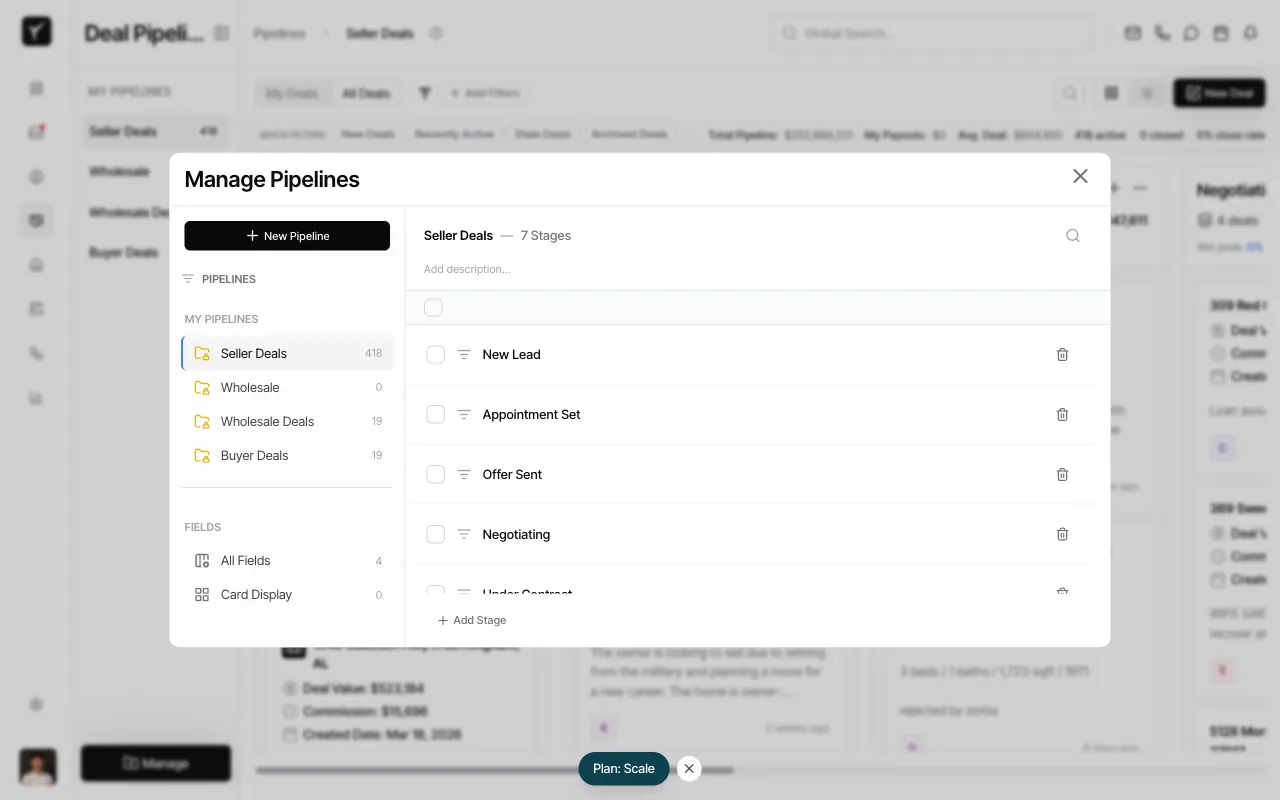
In the Manage Pipelines dialog, click the New Pipeline button to begin creating a custom pipeline.
-
Review the Create Pipeline form
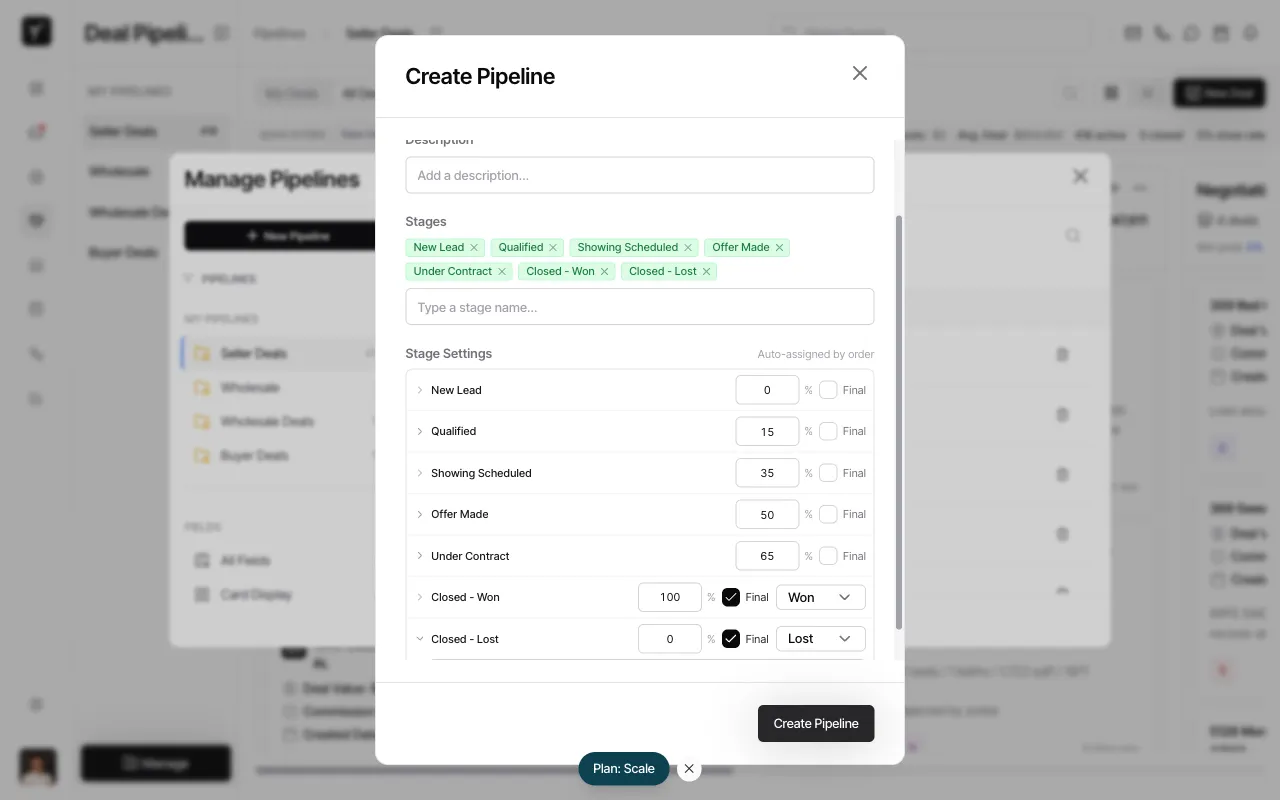
The Create Pipeline dialog appears with fields for pipeline name, description, and stages. You’ll build your pipeline step by step.

-
Name your pipeline and add stages
Type a descriptive name in the Pipeline Name field (e.g.,
Realtor Pipeline,Wholesale Deals,Buyer Leads). Then, in the Stages field, type each stage name and pressEnterto add it. Stages appear as tags above the input and are listed in the Stage Settings section below with an auto-distributed probability percentage. Most effective pipelines have 5–8 stages from initial contact to close — common examples includeNew Lead,Appointment Set,Offer Made,Under Contract,Closed - Won, andClosed - Lost.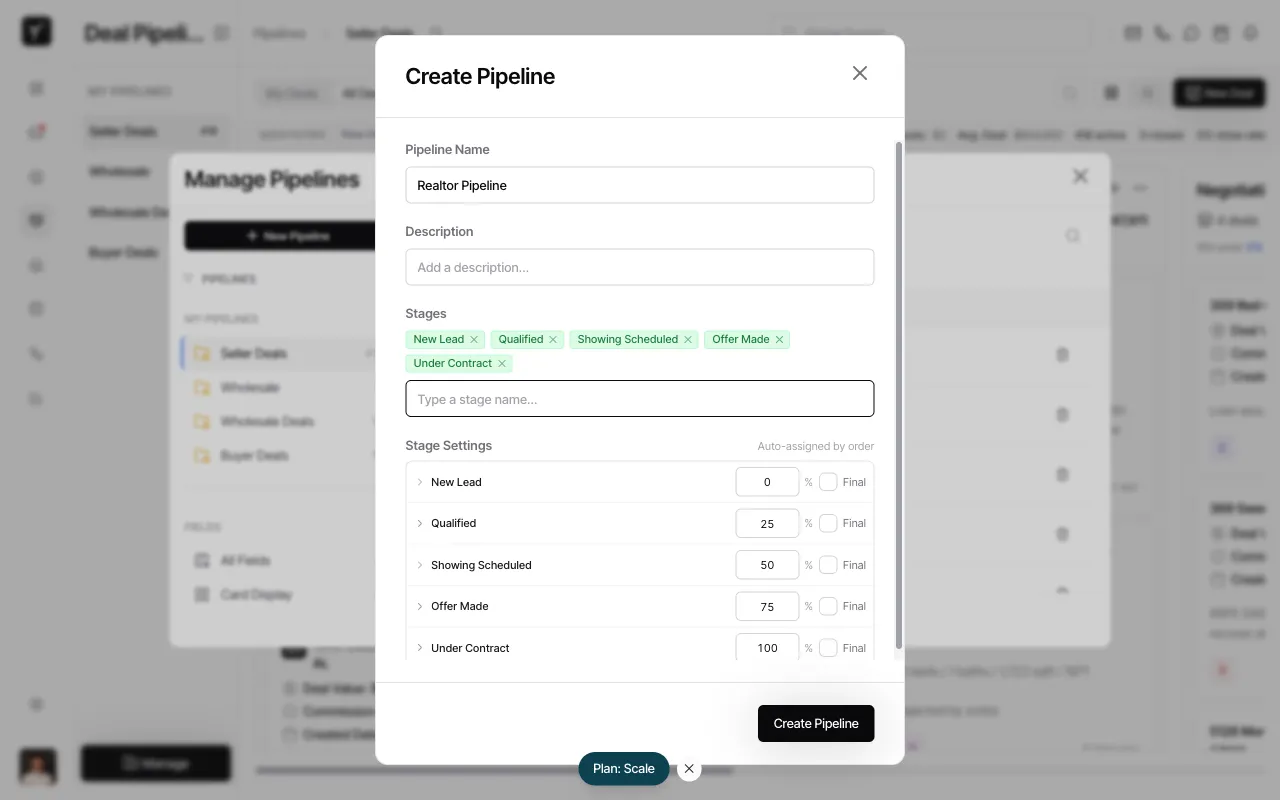
-
Mark your closing stages as Final
In the Stage Settings section, check the Final checkbox for your won and lost stages (e.g.,
Closed - WonandClosed - Lost). Then use the dropdown next to each to set the outcome type — Won for successful closes, Lost for deals that didn’t close. Final stages remove deals from active pipeline counts and velocity metrics.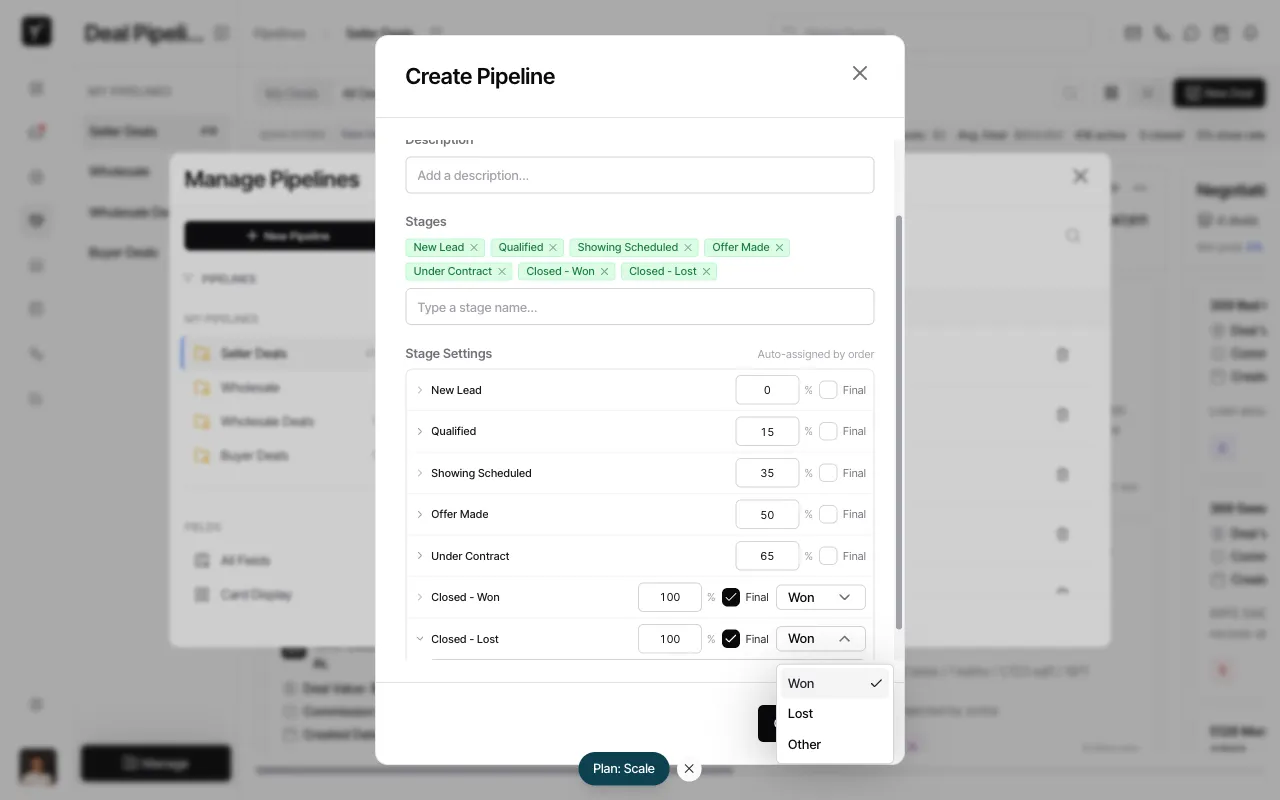
-
Create the pipeline
Review your configuration and click Create Pipeline. Your new pipeline will appear in the sidebar and be available to your entire team immediately.
Frequently Asked Questions
Section titled “Frequently Asked Questions”Q: What is a “final stage” and why do I need one?
Section titled “Q: What is a “final stage” and why do I need one?”Final stages represent the end of a deal’s lifecycle—either won or lost. When a deal enters a final stage, it’s removed from active pipeline counts, stops appearing in velocity metrics, and is marked as closed. Every pipeline should have at least one won stage (e.g., “Closed - Won”) and one lost stage (e.g., “Closed - Lost”) to properly track outcomes.
Q: Can I edit a pipeline after creating it?
Section titled “Q: Can I edit a pipeline after creating it?”Yes. Click Manage in the sidebar, select your pipeline, and modify stages, probabilities, or final stage settings at any time. Changes apply immediately to all deals in that pipeline.
Q: What happens to deals if I delete a stage?
Section titled “Q: What happens to deals if I delete a stage?”Deals in a deleted stage are automatically moved to a default stage (typically the first non-final stage in your pipeline). Your data is never lost, though you may need to manually reassign deals to the correct stage afterward.
Q: Can I have multiple pipelines for different deal types?
Section titled “Q: Can I have multiple pipelines for different deal types?”Absolutely. Many teams create separate pipelines for different workflows—e.g., one for seller leads, another for buyer prospects, and a third for wholesale deals. Each pipeline can have its own stages, probabilities, and automations.
Q: How many stages should my pipeline have?
Section titled “Q: How many stages should my pipeline have?”Most effective pipelines have 5-8 stages. This provides enough granularity to track progress without overwhelming your team. Start simple and add stages as your process matures.
Q: Is pipeline creation restricted by billing plan?
Section titled “Q: Is pipeline creation restricted by billing plan?”No. Any organization can create unlimited pipelines regardless of billing plan or subscription status.